Inspired by a bite of:
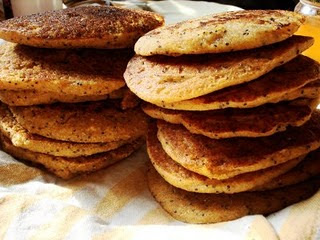
Tender Elstar Apple Cake
Today, biting into my adaptation of a classic Swiss apple-polenta dish (straight from Betty Bossi!), I paused to think about the culture that had inspired me to make it. The flavor was light and simple, yet satisfying and oh-so-homey. Still, apparently food for thought.
Let’s be honest; Switzerland is a land of agrarian fanatics. It’s not something to scoff at either. I have nothing but respect for anyone who devotes their life to producing good food-and Swiss farmers seem to have gotten that one to a T, even if they have a bit of a "short man complex" about their specialty. Yes, for some strange reason, Swiss people are usually either embarrassed about their country’s history of stubborn agricultural productivity (these would be, obviously, not the farmers), or suspiciously quick to point out how steadfast and impressive the Swiss agricultural system really is (yes, farmers talking here).
I can’t help but smile at anyone who is embarrassed in front of me about their country’s history. I am an American, which means a certain amount of humility when it comes to claiming my nationality, and I would never judge a country based on how it has been in the past. The point is what I am experiencing here right now. Learning about Swiss cultural history is easier here, now, in this small, mountainous country, filled with patchworks of grain fields, cow pastures, and milk production facilities, than any textbook could ever describe it.
One of the most tell-tale signs that farmers are a revered force in the Swiss population is the fairly close attention that even big supermarkets pay to stocking local food products. Well, part farmer-appreciation and part stolid nationalism, to be fair, but the result is still nice! Even massive corporate shopping centers often list the name of the farmer who grewthe vegetable you’re holding and the address where it was grown. Wow! When I stroll around the farmers markets it is an even more lovely spread of local fresh vegetables, and fruits, and fine, handmade vinegars, pickles, and jams; and there you get to look the grower in the eye, essentially, and see for yourself the life of work that went into your carrots.
Of course, Switzerland is most notoriously a cheese- and chocolate-loving nation, which can’t help me a lot as far as vegan-food-adventures go (yes, I tried anyway, with awful results, peer pressure still being a driving force in ‘adult’ life apparently!). Here is where history is again evident in the present: With about 2000 years of cheese-making under their belts, a lot of the Swiss I meet would be happy to live off bread and cheese for the next 15 years, easy. Well, and chocolate, clearly. That confuses me-that a people with the potential to grow amazing produce, who live in an ideal way for spreading it to everyone through the tight-knit networks of villages, small cities, and interspersed plots of land, already well-adapted to agricultural work, still devote most of their agricultural energies to the less resource-efficient dairy and meat industries.
All I can figure out is that tradition has a strangle-hold on the food industry, including that of consumption. Much of Swiss life is rife with traditionalism like no Californian could have imagined. Food is certainly no exception. When I ask people here for their opinions, there are two main answers. First, the need for protein-rich foods. This is a straight-shot to the tradition issue. In tribal Switzerland, meat was probably what people had learned to ‘cultivate,’ and with it milk and methods for preserving it. Now that banking is a close runner-up for Swiss cultural value, something tells me that most people aren’t actually hand-milking cows every morning, and the choice is about where their Swiss francs are going, not which food they have the ability to produce. The second is a simple taste preference for dairy and meat products. I can’t really argue with what tastes better to one person or another, but I have a feeling that there’s more to good flavors in Switzerland than Lindt, Käse Fondue, and Würst. Otherwise I would’ve been outta here a long time ago!
But the simple fact is that when you eat some of one thing, you end up eating less of another (ok, modern standards of over-eating aside…). If your first thought for breakfast is a hunk of Gruyere and a slice of topf (like the challah of swiss bread), you’ve just passed up the ripe, juicy plums, apples, pears, and elderberries dripping with natural appeal. How about a bowl of nüsslisalat (corn lettuce), grated celeriac, and purple carrots, all native, seasonal veggies (yes, even in January!)?
Let’s think further, to the simple, rustic cuisine that everyone dreams of mom bringing to the table at Christmas; The standards include potatoes, meat, salad, cheese (raclette or fondue), bread, and lots of cookies and chocolate. The great part is, it’s all local. The drawback? Well, I can’t eat most of it, for one! But also, the focus on meat, cheese, milk products, and wheat means less focus on the amazing variety of heirloom vegetables and fruits in Switzerland, or the wide spread of grain crops that can easily be grown here but are replaced with wheat. about corn? It is evidently completely possible to grow it here, because in fact, quite a bit is. There’s just one catch-like most American corn, it is a variety to be used for cattle feed. One of the common imported items I see is whole corn on the cob, while the pig sliced into your sandwich could have easily been fattened on locally-grown corn! Funny how the world works…
On the other side, we can’t forget that just because something is local doesn’t mean that it is native, or easier to be grown. In the short-term, buying local is almost always better because you are cutting down on the costs, environmental and economical, of importing. But in the long-run, we are often just supporting the chosen monoculture of a given region. Wheat, spelt, and rye are NOT the only grains that grow in Switzerland. For whatever reason, cost, quantity, versatility, or demand, a few crops were chosen for Switzerland to produce on large scales, and that’s the way we’re taught to buy. It’s completely ludicrous to think that only a few kinds of plants are Switzerland-friendly. With major geographical differences from region to region, it’s a country supporting many vastly different microclimates in its small, mountainous confines. For example: Um, the Alps?
Changing something like the amount of agricultural biodiversity in a society isn’t something I know how to do. Do you? Then help me out. In the meantime I can try to cut down on both imported and local-monoculture foods, and eat…well, heirlooms! Lucky for me there is an almost guerilla-like movement of heirloom activists in Switzerland, who distribute the seeds for personal use and research the ‘lineage’ of plant species all the way back to texts from monastery’s of the Middle Ages.
Now, here I sit with a piece of Tender Elstar Apple Cake in front of me. The ingredients are the usual hodge-podge of what I had and what I wanted, and the result is a multi-cultural take on a Swiss tradition. Inside are little South American Amaranth grains, Italian polenta, and cashews from…it doesn’t actually say, and that’s eerie. Everything inside is organic, and some things were locally produced. Some came straight from the farm, like the apples and the elderberry blossom syrup. But how much better is it to enjoy this newly hyped gluten-free grain, fair trade and more well-traveled than most Americans my age, than to buy the Kellogs Corn Pops, which are also gluten-free, cheaper, and produced on the same continent? Well, I would still say it’s better, but it’s not as much of a perfect action as I would like to imagine.
It’s so easy to fall into the traps of advertising and wind up wreaking havoc on our supposed ‘environmentalist’ morals. Where does our soymilk come from, dairy-free eaters? If you make your own, where are the beans grown? Rice milk? Almond milk? How far have the ingredients for your perfect curry traveled? How much plastic should really be involved in buying organic peppers? I just have to think that if what we need is a change in the way we shop and eat, what we need is less mindless extremism and more conscientious decision-making. “I shop all organic” is not enough to make me living well in relation to the environment, the economy, and other individuals. Neither is “I shop local.” It is a complicated, messy state our food has sprouted into, and the answers are similarly messy.
Don’t underestimate your actions! Think!
There is no codified method for ‘good’ actions-the answer always lies in the moment, and to face this is the most honest expression of humanity. When you enter the grocery store, whether you choose the farmer’s market, the local organic shop, the Tesco, the Walmart, or the garden, what you have to work with is always the next choice. Organic and imported, local and sprayed; fair trade from South America or grown next door by underpaid immigrants; packaged or bulk; paper or plastic; savored or snacked; spoiled or saved…Think about it. Enjoy the process. This is living. It is our gift and our eternal possibility to do it with as much awareness as possible. Two bites into my Elstar Cake, I’ve got a smile on my face as I think about exactly what it means to eat “Swiss”.
Read more...