Unexpected Lessons

>> Wednesday, December 30

Cleaning out my blog, as it were, I found this old, unpublished post.  I like the message, so I thought I'd post it now.  enjoy!  
originally written february 19, 2009


Although we have been made to believe that if we let go we will end up with nothing, life itself reveals again and again the opposite: that letting go is the path to real freedom.
- Excerpt from The Tibetan Book of Living and Dying By Sogyal Rinpoche

That's what I wish I had read last week, mid-afternoon before yoga class. Maybe then I wouldn't be sitting in my house with a leg sticky from Tiger's Balm and a strong longing for nothing more than the ability to bend forward, suddenly very unrealistic. I've read again and again the yogic principle of "ahimsa" or "non-violence", and I claim to understand it. Yet for every time I've read it, I'm pretty sure there's a good example of how I have not applied it when I could have. That's ok, some things you've got to learn by doing (or not doing) but it's getting old to keep pushing myself just beyond my limits when I know deep down I shouldn't. This time it won't matter; I need to work harder, I tell myself, and that was exactly what was going through my head when I pulled a hamstring last week. Again.

The truly annoying part? I kept going to classes and didn't mention it to the teachers. Massochism? Maybe more like Daniela suggested a few weeks ago: victimization. Or at least, the need to feel like a saint for bearing my discomfort in silence. Ouch. Good ol' ego is kicking at that thought. Whatever the reason, I kept pushing myself and yesterday felt a resounding pop in standing split that brought on instant tears. Now, even walking hurts. It's a challenge not to let it piss me off. I would like to be seriously angry at the situation, and last night, walking very slowly to the tram stop with Daniel watching quietly and waiting for the explosion, I was. I felt like every bit of progress I've been making has been an illusion-I've been practicing so much better, so strongly and smoothly, and without feeling challenged horribly all the time. I thought I was really breaking into something new, and that's part of why I decided to go for my teacher's training this May. Suddenly, with a self-inflicted limp, I wondered out loud if I am just running into something I haven't even begun to understand.

I said it out loud, maybe hoping for an easy, verbal response. But there isn't one. There is no simple answer to a problem that goes to the center of who I am. Honestly, I believe that we are all capable of understanding and embracing yogic principles and lifestyles; practicing non-violence while practicing self-discipline and study; finding absolute joy in every moment without the constant buzz of self-gratification and affirmation. We can all just "be" and be fine with that. Admitting that it's something we may never reach is the part that puts me in my place every time. I think, "wow, yeah, I get it, peace and respect and resolve and release, all at the same time, I totally see that, I can do it." And if I meet a challenge, it crumples fairly easily into fear and self-doubt, showing all too clearly that I'm just setting up pretty pictures for myself of what I think I should be doing, not what I am doing. If I was really releasing, I would have no problem with never reaching perfection-or with doing half a standing split when my muscles are stiff.

The beautiful irony of the situation is that what I need is to slow down, and by ignoring that need initially, I have forced myself into a position where I have no other choice. Life teaches us lessons, and the one I thought i needed to learn (discipline; strength; something masculine and difficult) is only something I have imagined. I, and probably you too, live in a society which preaches hard-headed masculine strength as the cure-all for lifes problems. When I see a wall, I want to kick the fucker down, or jump over, or somehow prove I'm powerful enough to dominate it. Maybe next time I'll stop stubbing my toes and scraping my knuckles, and just enjoy the shade and shelter from the wind.

Enlightenment is the "quiet acceptance of what is". I believe the truly enlightened beings are those who refuse to allow themselves to be distressed over things that simply are the way they are.
- Wayne Dyer

Read more...

One Whiff of Autumn-and the cook is back.

>> Tuesday, October 20

It started a few weeks ago when I went to see Daniel's parents in the village and they brought out the walnuts. Not the appetizer nut bowl, I mean the 20+ crates from the cellar. It wasn't long before they were loading me up with squashes, little pumpkins, and enough garlic to kill the Vampire race. Daniel shook his head helplessly as we tottered to the train station with our harvest loot, and commented, "looks like autumn is really here." I didn't say it, but you know what I was thinking? BRING IT ON.

Because autumn this year is like Christmas-too many delicious things to eat them all and a lot of random gifts from people who are basically just trying to get rid of the junk. Only it lasts for about 2 months and all your presents are really good. And I musta been a good girl this year, because my metaphorical stocking is fit to bust. And as far as my literal stockings are concerned, they'll probably be busting too as soon as I get done eating all this yumminess. Let the games commence.

Now let's get down to business-I already confessed my unjustified long absence and you know (come on, you KNOW) how sorry I am, but still-here's my first shot at redemption:

The 'Make Every Day Thanksgiving' Bowl
serves 4 as a one-bowl meal, or lotsa people as a side

Ingredients:
2 little pumpkins (canteloupe sized-about a 7-inch diameter
1/4 cup olive oil (plus some for basting)
3 cups cooked millet or 2 1/2 cups millet flakes (or cornbread crumbs, that would be radical)
1/2 cup dried cranberries
1/4 cup ground nuts of choice
(opt. add in some chunky pieces of nuts too, mmh.)
4 stalks celery, daintily chopped
1 onion, chopped
6 cloves garlic (woah! but it's good...), chopped
juice of 1 lemon
1-2 tsp soy sauce
1 tbsp apple cider vinegar
1/2 tsp cinnamon (plus a sprinkle)
1/4 tsp nutmeg (plus a sprinkle)
2 tbsp fresh chopped rosemary

1/4 cup+ apple juice
a splash of veggie stock or some boullion (cheaters! ha, that's what i did) and extra apple juice

salt and pepper to taste

Directions:
Preheat the oven to about 350 F, or 170ish C

Cut off the stem and the little flower bump on the ends of your pumpkins, being careful not to go deeper than you need to. cut them in half, er, height-wise? Well, so that the parts you just cut are now the bases of two bowls you have created. scoop out the seeds and save for roasting if you want. Also save a wee bit of pulp and toss it in the stuffing if you fancy.

Rub the pumpkins down with some olive oil and sprinkle with a dash of cinnamon, nutmeg, and salt. Bake for about 30 minutes, or until almost totally tender when poked.

Meanwhile, heat a tbsp of your oil in a pan over medium and sautee the onions until glassy. Add the celery and cook for about 2 minutes. Then add the millet, and-actually, just toss it all in there. Everything. Keep going til you feel you shouldn't any more. I cooked mine about 10 minutes total just because I kept adjusting the taste.

You wind up with a nicely mingled mush, but not tooooo runny, just comfortably un-solid.

fill your pumpkins and bake for another 15 minutes, or until the stuffing looks lovely and crusty on top and the pumpkins seem good and tender.

voila!

Read more...

Where's Erin?

>> Monday, September 14

Hey!
Yes, I'm still here. It's been, what, 4 months, almost FIVE?? Unbelievable. I can't believe I just abandoned you all like that. But I'm back, and with a whole arsenal of interesting ideas about food, life, love, personal satisfaction, and dealing with allergies and the 'psychology of food.'

That being said, give me a moment to catch my breath, and I will be back shortly with my findings! Anyway, today I'm starting school (art school in basel, switzerland, woot!), so I have bigger fish to fry at the moment. Vegan fish.

Read more...

A Collection of my thoughts on Yoga.Food.Art and everything in between

>> Friday, May 29

The Moral Food Conundrum
Unexpected Lessons

Read more...

Recipes

All of my Recipes are Gluten free, and most of them are vegan. All of them are made with love :)


Breakfast
Amaranth Apple Porridge
Chai Kuzu with Quinoa
Cornmeal Pancakes with Lemon and Poppy-Seeds
Sourdough Buckwheat Crepes

Bread and Other Doughy Things
Basic Recycled Bread
Bob's Red Mill Chickpea Bread
Carrot-Pulp Bread
Mom's Cornbread
Recycled Bread (Kvass-Potato Paprikash)

Snacks, Starters, and Sides
Beluga Lentil Bites
Canapés Impériale (chickpea crackers and toppings)
Dolmas
Salads, Dips, and Sauces
Lemon Zatar Yogurt Dressing
Mustard Sprout Salad
Roasted Red Pepper Tahini
Spicy Chickpea Salad
Sundried Tomato and Black Olive Dip
Vegan Cream
Vegan Mint Raita
White Bean Salad

Soups and Stews
Butternut and Fennel Seed Miso
Calico Kicheri (red and brown lentils, brown rice)
Chunky Pumpkin Soup
Four Bean Country Stew
Kale Kicheri (indian inspired lentil dish)

Bakes, Roasts, and Other Savory Mains
Baked Black Beans
Enchanted Broccoli Forest Fire (quinoa, lentils, and broccoli)
Herb-Strewn Roasted Beets
Roasted Beet Risotto
Stuffed Winter Squash-Thanksgiving Bowl
Vegan Quiche Provencal
Quick Balsamic Tipped Veggies

Sweet Treats
Apple Banana Muffins


Banana Cake (with help from fellow bloggers)
Dessert Sushi (Tahini cookies with Red Bean Paste)
Gingerbread Pudding
Mandarine Upside-Down Cake (not vegan)
Red Bean Paste
Rice Milk
Tahini Cookies
Zucchini Muffins with Chocolate Frosting (NOT Gluten-Free!)

Read more...

More Lentil Balls

>> Sunday, April 12

Every time I get lost in my kitchen, I cast out in the darkness for a helping hand and who do I find?  My good friend Beluga.  Beluga Lentil, that is, and he never ceases to amaze me with his solutions to my ponderings, as in today's :'what can an anti-candida, gluten-free vegan eat?


Answer: More lentils.  In ball form, they look less like lentils, which is good, because i'm starting to see them even with my eyes closed this week.  These, however, could be falafel with a suntan, and I didn't think once about the fact that I was eating lentils.  Again.

Simple Double-Lentil Balls

I was out of lemons, but I think a litle lemon juice in here would have been fantastic. For non-ACD eaters, add a splash each of apple cider vinegar and braggs for some kick.

1 cup beluga lentils
1 cup red lentils
1/2 cup amaranth

1 leek or onion, chopped
1 turnip, grated
1 tsp pepper
1 tsp salt
1/2 tsp turmeric
2 tbsp fresh chopped rosemary
6 cloves garlic, chopped

2 tbsp sesame oil
1-4 cup pumpkin seeds

Add 3 cups of water to the lentils and amaranth in a saucepan.  Bring to a boil, cover, and cook until the water is absorbed and the red lentils have broken down (add more water if necessary).  Stir vigorously and cook until the mix is very thick and sticky. 

stir in the rest of the ingredients, reserving the oil and pumpkin seeds.  Mix together into a thick dough.  Roll about 2 tbsp of dough into a ball, brush with oil, and stick 2 pumpkin seeds into the top.  Place on a parchment-lined or grased baking sheet and repeat until you used it all. Bake for about 30 minutes, until browned and crispy on the inside.  

Serve with Lemon Zatar Yogurt Dressing or Luscious Tahini Whip for a protein-ilicious vegan main dish.  Or, toss with rice noodles and tomato sauce and you have spaghetti and meatballs!

Read more...

Cooking for the Gluten-Tolerant

With sugar-free april and a lot of foods excluded from my diet, I'm finding that to keep cooking, I have to cook fr other people! I had a bunch of leftovers on April first that had ingredients I am not eating this monht, so I decided to roll them all into one fantastic recycled bread loaf-a mix of beet salad, miso soup, and kicheri is what you see here in this gorgeous, colorful loaf:


To my 2 cups of leftovers (warmed to room temperature), I added about 2 cups of flour (what and spelt, mixed), 1 packet of yeast proofed in about 1 cup warm water, some salt, some pumpkin seeds, and...I think that's about it. Eassssssy. Unfairly easy, if you ask me-gluten free loaves have so many more ingredients!


And when it comes to desserts, I made another batch of things for the studio last weekend, and these were some of the best yet. These were glutinous, sugary, chocolate-covered zuchinni muffins, and I hear they were fantastic. Vegan, but otherwise untouchable, sorry celiacs!


Beautiful frosting drips are courtesy of Mister Dani T, who is the resident artist in the kitchen.


The recipe was something like this:
1 very large zuchinni, grated
2/3 cup soy milk
2 tbsp molasses
1/4 cup canola oil

2 cups flour (wheat and spelt)
1 tbsp baking powder
egg replacer for 2 eggs
1 package vanilla sugar
a bit of cinnamon, nutmeg, and cardamom
2/3 cup sugar
pinch of salt

Mix the dry stuff, mix the wet stuff, add it all up, and spoon into a (12-)muffin tray. Bake for about 25 minutes, until lightly browned. They will be slightly too moist still on the inside, but they firm up as they sit.

for the frosting:
4 tbsp margarine
2 tbsp soymilk
1/4 cup powdered sugar
1/4 cup cocoa.

cream together and test for consistency and taste.

Read more...

Enchanted Broccoli Forest-Fire: A toasty stove-top rendition of the classic casserole

>> Thursday, April 9


The Enchanted Broccoli Forest, one of Mollie Katzen's many beautiful cookbooks, is one that I treasure. Daniel and I got a copy in the states when we visited last summer and backpacked around for two months with it gingerly wrapped in layers of bags so as to get it safely back to the old continent. Here, we hoard it like miserly jewel-collectors, rarely daring to open its gleaming depths to those who pass through Dani's kitchen, where it sits discreetly behind a Moosewood. After all, cookbooks like that are hard to come by here, and you never know what a Swiss foodie might do if she discovered there was more to the kitchen than cheese and bread, so we like to initiate people here to the land of good veggie cooking step by step...

Anyway, the cover recipe, The Enchanted Broccoli Forest itself, is amazing, delicious, wonderful, and today, I wanted it bad. However, being the anti-candida eater I am right now, I felt a little weird eating a meal mostly consisting of rice. Also, I just didn't want to deal with baking anything. It's so warm, the birds are singing, the windows are blowing open in the breeze...all this scene is missing is the sizzle and pop of some nutty roasted quinoa.

By using quinoa as my grain, I'm eating a lot more protein and a lot fewer carbs than if I had used the usual brown rice, and lentils are even lower in carbs, being in the legume family. Plus, they're downright nutritious and delicious. We have heaps of Birsmattehof spinach (fresh from our local organic farm), and i just bought broccoli, and Hari gave me some of the succulent little sundried tomatoes Niki brought back from Israel, so it seems we have a contestant for today's mind-blowing anti-candida cookoff (a competition taking place solely in my head, but none-the-less a worthwhile pursuit). For those of you who don't have candida problems, feel free to spice it up a bit with with...whatever. I actually don't know why you'd want to improve on this amazing dish, I just keep imagining that everyone who can eat sugar must be enjoying something I'm not. But not today. No sirree, I've got one up on sugar cravings this evening.


Enchanted Broccoli Forest-Fire: a toasty stove-top rendition of the classic casserole (for 4)

1 cup quinoa
1 cup beluga lentils
1 medium head broccoli
a few massive handfuls of fresh spinach
1 stalk celery
1 onion, diced, and/or some chopped leek
10 sundried tomatoes (dry or in oil), chopped into strips
any additional veggies you may be craving/have on hand


juice of 1/4 lemon
1 tbsp fresh, chopped rosemary
odorous amounts of garlic (about 6 cloves), chopped
2 tbsp flax seed or flax seed meal
a tiny bit of sea salt
4 twists of fresh ground black pepper

optional: 10 activated almonds, chopped

Directions
Cook the lentils in water until tender, drain, and set aside.

Meanwhile, heat a medium skillet and add your quinoa. Stir almost continuously until the quinoa is browned and smells roasted, 2-3 minutes. Add 2 cups water to the quinoa, cover, and cook until the water is absorbed.

While that's going on, chop up the broccoli, almonds, rosemary, garlic, and all your other veggies (except the spinach).

When the quinoa is done, push it to the side in the pan and add the broccoli, leek, onions, rosemary, and other veggies that need a bit more cooking to the pan. Add a splash of water, cover, and reduce the heat, steaming the veggies for about 4 minutes, or until shiny and tender. then mix it all up, add all the rest of the stuff, and cook until it looks and tastes good, about 4 minutes.
I'm not telling you how to live your life here, but I highly recommend some Lemon Zatar Yogurt Dressing over a nice hot bowl of this for a zingy mediterranean flavor combo that's out of this world.

Read more...

Many-a-Dark-Green Later: Sugar-Free Week One

>> Wednesday, April 8

In case you missed my last posts, I am eating along the guidelines of the Anti-Candida Diet this month in an attempt to balance the yeasts in my body. I am also participating in the Chase Daylight Vegan Challenge with this cleanse, and you should really check out Ryan's awesome blogging on her adventures in the world of veganism. Now, onto the sugar-free frontier...

Funny how when we make dietary commitments, they seem remarkably simple. No refined sugar? Heck, I've done that before. I love the natural flavors of foods, and I don't usually need anything to sweeten my already delicious fruits and veggies. I can easily skip the brown sugar on my breakfast porridge. I felt anything but insecure last Wednesday as I decided once and for all to go anti candida this month.

Blow number one: I didn't just lose the obvious crystallized and syrup sugars. I also cut out all fruits, except for avocado, tomato, and fresh lemon. That hurt a little. No apples or bananas in my breakfast porridge now. Looking stark. I got a definite sad face, but I kept my chin up.

Then came blow number two: low-carb diet. Gotta cut out as many carbs as possible so the yeasty little beasts can't feed on them. So not only are the apples and bananas gone from my breakfast bowl, the porridge is called into question too. While whole grains are allowed, they aren't really the focal point any more. That is a bit strange for most eaters, myself included. Add in the loss and/or reduction of starchy vegetables, like potatoes, carrots, and beets, and you've got one confused cook.

I wracked my brain and those behind many, many anti-candida websites in my quest for simple recipes this week that were vegan, gluten-free, and anti-candida. That's not a lot of wiggle room, my friends. But, a few bland dishes of plain greens later, I emerged with my first good anti-candida recipes, which are here for you to enjoy.

First, because I did Shankhaprakshalana to start my cleanse, an ayurvedic intestinal cleanse from Asana Pranayama Mudra Bandha, I knew I had to start out my eating with lentils and rice. specifically, it's supposed to be a very simple kicheri with ghee and turmeric. I opted for plain red lentils, brown rice, and turmeric with flax oil on top. Delicious.

By day 2 I introduced some veggies to the meal, but kept the thick soupy consistency for ease of digestion. Unlike the juice fast I did for new years, this one recommends cooked veggies to start, again for ease of digestion. To each her own, so whatever feels right is probably it. For me, cooked, soft, and gentle sounded good a mere 48 hours after flushing everything out of my digestive tract.

The meal here is kicheri with the addition of a little carrot, turnip, garlic, onion, parsley, and kale. The flavor is unbelievably good, and the texture is so comforting and easy on the belly. I have no qualms about eating this meal regularly for the rest of my life, candida or no! I didnt use traditional Indian methods for cooking because I didn't want to fry the oil or spices in the beginning. This is more like a one-pot homey stew than your average restaurant kicheri, but it's really, REALLY fantastic, healthy, and easy.

If you're not on the ACD (anti candida diet) feel free to add more carrots and other starchy veggies, or not!


The dish here is shown with less kale than the recipe calls for.
Expect much more delicious greenery, this bowl wasn't quite up to snuff!)


Humble Kale Kicheri (for 3)

1 1/2 cups red lentils
1 cup brown rice
2 tsp flax oil
4 cloves garlic, chopped
1 carrot, chopped
1 turnip, chopped
tons of kale, chopped
a bunch of parsely, chopped
1 yellow onion, chopped
1/2 tsp turmeric

Rinse the lentils and rice and put in a pan with 3 cups water, the onions, carrot, turnip and the turmeric

Bring to a boil, cover, reduce heat, and cook for about 30 minutes. Stir occasionally and check that all the water doesn't evaporate. Add more as needed to keep the consistency a little on the stew side.

When the rice is done, add the kale, parsley, and garlic, stir them into the kicheri, and cover again. Cook for 5 minutes and turn off the heat. Serve with flax oil drizzled on top, and roasted pumpkin or sunflower seeds if desired. mmm....


When I felt like I couldn't eat another bite of kicheri (took about 4 days), I entered the realm of other legumes. I made a very hearty bean soup with I used as a base to add steamed veggies to for a few meals in a row. It was extremely satisfying yummy, especially given the simple ingredients list:

Four Bean Country Stew (makes 4-6 servings)

3/4 cup dried kidney beans
3/4 cup dried black beans
1/2 cups dried chickpeas
1/2 cup red lentils
1 piece kombu seaweed

1 cup large onion chunks
6 cloves of garlic
2 sprigs fresh rosemary
1/2 tsp turmeric
1/2 tsp fresh ground black pepper
a dash of salt

2 carrots, chunked
1 turnip, chunked
a whole lot of dark green: spinach, kale, chard, etc.
1/2 cup chopped fresh parsley

Soak the kidney beans, black beans, and chickpeas overnight. Drain, rinse, and set in a pot with the kombu seaweed and about 6 cups water (adjust as needed to keep from drying out). Cook for 1 1/2 hours, or until the beans are tender.

Add the lentils, carrots, turnip, onion, salt, pepper, turmeric, and rosemary. If needed, add a little more water. Cook, covered, until the veggies are soft, about 30 minutes, and add in the greens, parsley, and garlic. Cover again and cook for 3-5 more minutes, until the greens are wilted and the garlic is just cooked. Serve with roasted pumpkin seeds and/or steamed broccoli.

Finally, I couldn't look another bean in the eye, and I turned to salads for lighter fare. It's hard to make a salad that's truly satisfying when you're used to a bowl-full of hot carbs and protein. I came up with a few types that really hit the spot though. I didn't manage many pictures, but here are two with photos at least.


A super simple mix of nüssli-salat (corn salad) and spinach topped with avocado, celery, roasted sunflower, pumpkin, and sesame seeds, and a drizzle of flax oil.


A bombilicious spinach and unidentified dark purple green (use any lettuce you want) with carrot, celery, roasted flax, sunflower and pumpkin seeds, and this incredible, AMAZING Lemon-Zatar Yogurt Dressing.

OMG it's so good. I served my salad with a little more dressing spread over a rice cake and sprinkled with more zatar, because I couldn't resist.

Lemon-Zatar Yogurt Dressing
1 cup plain soy or other yogurt
2 tbsp flax oil
2 tbsp zatar
juice of almost a whole lemon (about 3/4)
1 clove garlic

Grate the garlic clove and mix it all up. For a thinner dressing, add a bit of water. That's it! Try not to eat it ALL off the spoon directly, it's worth the wait to put it on a salad....

Last, but certainly not least, was a Creamed Avocado-Arugula mix. Very simple and good. I served it with fresh spinach alongside Kale Kicheri for a dark-green foodgasm yesterday afternoon.

Creamed Avocado-Arugula Salad (serves 4)
1/2 ripe avocado
juice of 1/2 lemon
a twist of fresh ground black pepper
a dash of salt

water as needed

150 g fresh arugula, washed
50 g spinach, washed

Mash the avocado with the other dressing ingredients until creamy. add water and whip until the mixture is fluffy and barely pourable. Toss the salad arugula and spinach with the avocado blend and top with roasted seeds, cherry tomatoes, chopped celery stalk, or anything else you like.

Read more...

Tonsa Pho-n: Vegan Miso Pho

>> Wednesday, April 1

A sea of veggies

With a surprise below

It's a terrible pun, but it's still funny if you know that 'pho', the name of the classic Korean noodle soup, is actually said "fuh". It is. It's also known for its masses of meaty ingredients-from meat stock to chunks of beef, chicken, shrimp, octopus, squid, mussels, egg, pork, and crab. In California restaurants, there is always a vegetarian option too, but I have no idea how they manage to replicate the amazing broth flavor of traditional pho. I looked up some recipes the other day, and it seems complicated. I'm intimidated by complicated asian recipes becaus eI don't know which boundaries to respect. But I happen to know another soup-loving asian country with very easy recipes: Japan. Erin's gone all trigger-happy with the miso again.

This soup is absolutely the most satisfying, umame-loaded bowl of deeeelish I've made. I just ate it for lunch 3 days in a row. It's not exactly like pho yet, I have to perfect the faux-pho taste (somone stop me), but it's so good you won't care. And you know what, if you are a bento fan, this is a great bento meal. You can easily take along a bowl already made with a side container of chopped mint leaves, onions, chives, chilis, sprouts, or any of the other magnificent pho toppings out there. For those of you with access to a kichen at work, just take the ingredients and enjoy the zen-like process of finely slicing your leeks and ginger root next to all the fools with Campbell's soup cups. You won't notice the funny looks, because the tendency when eating perfect food is to, er, pho-get the world around you...

Vegan Miso Pho (for 1 medium-large lunch. I couldn't finish it all!)
I brought the ingredients to work and made mine there: I premixed the spices, brought the portions of whole veggies, garlic, and onion, and stuck the rice noodles in a tupperware with the tiny sack of seaweed and a plastic-wrapped miso ball (i used the corner of an old ripped produce bag). Learn more about miso balls at Just Bento, Maki's wonderful bento blog.

Ingredients
A single serving of rice noodles, whatever you deem appropriate
2 tbsp Arame seaweed
2 dried mushrooms of choice (shitake would be great, I had some Swiss thing)
1 small carrot, sliced into thin rounds
1/2 leek, sliced into thin rounds
6 little chunks of tofu (opt)

1/2 red onion, diced
3 cloves garlic, minced
1/2-inch chunk of ginger root, minced
1 dried red chili, chopped, ground, or use a pinch of hot cayenne, paprika, or chili powder
2 tsp dark miso paste
1 tbsp toasted sesame (or other, less delicious) oil

a twist of black pepper
1 tsp turmeric powder
1/2 tsp fennel seeds
4-5 cumin seeds
1/2 tsp anis seeds, if you have them (i didn't)
a dash of nutmeg
salt if desired

garnishes: chopped mint leaves, cilantro, onions, chives, chilis, or mung bean sprouts.

Directions
Put the seaweed and mushrooms in 2 cups cold water to soak

Boil 2 cups water, pour it over the rice noodles, and let them sit for a few minutes, or until soft (or follow the directions for your noodles). Drain and set into the bottom of you soup bowl.

In a saucepan, heat the oil and add the spices. Cook over medium-low heat, stirring, until nothing pops anymore (a minute or two).
Add the ginger, chili, and onion. Stir and keep cooking until the onions are glossy.
Add the leek and tofu, and if necessary, a dash of water. Keep stirring and scraping off any spices that stick to the bottom, until the leeks are tender.

Pour the water with the seaweed and mushrooms into the pan, stir thoroughly, and cover for 1-2 minutes. Keep the heat low enough that it wants to simmer but can't quite. Add the carrots and garlic, and cook for another few minutes, until the carrots are barely cooked, but nowhere near soft. Remove from the heat and stir in the miso by first dissolving it in a spoonful of hot broth. Serve!

Read more...

Banana Cakes for the Masses


Migros, a massive supermarket chain in Switzerland, seems to hate ripeness. They like their avocados with the squeezability of hand-grenades, their tomatoes the color of blushing porcelain dolls, and the oranges...well, "blond" is not just the variety name.

I know this because the rack of discount items by the door is always filled with the ripest items-already marked half price because obviously the potential of smelling a ripe fruit is grounds for composting. This is especially true with bananas, one of the touchiest fruits known. The acceptable bananas leer their green little smiles at me every time I go in, and if you're like me, and don't plan your cooking projects, there's no time to buy emerald bananas and wait for them to mature.

Point being, Eve struck gold last week and found a bag of about 15 bananas, perfectly ripe and only one or two with a hints of brown spots on the stems, for just over 3 francs. That's called 'a score,' for those of you uninitiated into my mom's shopping world. Anyway, when life hands you bananas, make banana cake. I made two, and it felt good. Real good.

For all you gluten-boycotters, I am very sad to say that one was NOT gluten-free...probably the first gluten-containing product I have made in 2 years. But I made it for the folks at B. Yoga to enjoy, and it seems needless to deal with gluten-free baking for people who mostly don't care...well, I still felt guilty measuring up wheat flour, like a shadow from the past was lurking around the corners of the mixing bowl, but I stayed strong, and the cake was rumored to be good, so you can make it for someone you love but has unfairly strong digestion, or you can just modify that little puppy and see what's what.

The base recipe was for Tried and True Banana Bread from Savvy Vegetarian. I used half spelt, half wheat flour, powdered egg replacer instead of the cornstarch mixture, and margarine instead of oil (unusual, but I had it). I also hucked in the last of the dried bananas, chopped up into rounds. I didn't bother taking a picture, because who cares, it has gluten anyway. Grin...

The other, the edible one, is essentially Karina's Sweet Banana Polenta Cake, from the always fabulous Karina's Kitchen Blog, with just a smidge of Erinization:

I did egg-free, with egg replacer for somewhere around 2 eggs,
random leftover soy creamer for the milk,
margarine for oil,
vanilla bean instead of extract,
an added grated apple because...I can,
and my sugar was actually a blend of 1 tbsp molasses, 2 tbsp agave, and 2 tbsp sugar beet syrup.

I also chopped up a banana and stirred it in to get nice melted banana chunks in the finished cake, which was so good I think I should triple the amount of chopped banana next time-and you should too.

Read more...

The Chase Daylight Vegan Challenge: Erin's going sugar-free

A good yoga teacher: One whose honesty is never curbed by fear of bluntness.

"You're getting stinky again," a little text in my google chat notified me yesterday. "Maybe it's candida."

momentary glower. Everyone loves being reminded that sweating in the 8th breath of warrior 3, they smell bad. Then a few deep breaths and...shanti, shanti, shanti, "yeah, I know." Because honestly, I do. Three months after my 10 day juice fast, I'm starting to feel a little too much like the pre-fast Erin-cranky, tired, and careless about my food choices. And, sigh, i do sweat again in yoga class, which is a sure sign that I've got some toxins to be released. Granted, as my mom pointed out, fasting is an extreme, and you can't stay at that level of purity and vitality while eating a normal diet forever, but...I have a nagging feeling of needing to reset the balance by doing mini-fasts or other cleansing things for myself every once and a while. Thre month gaps seem like good chunks for a re-evaluatin to take place. Here's my score:

All-around apreciation of eating good, healthy, and eco-friendly food: A+. I love my food, my food loves me, and no one is dying in the process (me from allergies or animals becoming steaks :))
Meal Sizes: B-. Pretty darn good, I ate enough to be full but not stuffed, and listened to when my body was hungry, especially for the first 2 months. But the past 3 weeks have been a bit rollercoastish for my tastes-example: there were 3 days of gobbling white rice dishes last week that sent me into a carb coma the size of Switzerland.
Treats: C. Ouch, slipping a little here. Yes, Erin has a sweet tooth, and rears its head most when the sun starts peeping out. "Why not a little chocolate, why not another cookie? Let's enjoy life French-style..." she says...and she's right, except that the french don't ususally clear the plate of cookies, do they ;)
Allergens: C. So many unfortunate mistakes in this category! I seem to have encountered gluten in evrey shadowy corner this year, and always when i least expect it! definitely need to be a little more reluctant to accept food from other cooks, with at least enough hesitation to get a bonified ingredient run-down first.

Today, I did Shankhaprakshalana (intestinal cleansing), a shatkarma (purification practice) from the Bihar School of Yoga's Asana Pranayama Mudra Bandha. Basically, you drink a lot of saltwater early in the morning in between rounds of yoga poses until the laxative effects kick in and, well, you get the idea. after you finish, you rest for 45 minutes and eat kichiri, my favorite indian dish of rice and lentils. Traditionally, the rice and lentils are served with lots of ghee to lubricate the naked intestines, but as a vegan, i opted for a mix of flax and sunflower oils, coldpressed and local. Then you rest for 2 days, eating nothing but kichiri, and for a month after you treat your digestive system like a newborn-non-acidic, mild, comfort foods, like, clearly, kichiri!

Today, in my required relxation hours, I looked around for a nice new vegan blog challenge and I found one just for me: The Chase Daylight Vegan Challenge, where Ryan will be trying a month of vegan food for the frst time. Everyone's invited to join and there are potentially some vegan-licious prizes involved...As I'm already a vegan, I am free to try my own version of the challenge, so I'm going sugar-free for April. I mean really sugar free, not just "granulated sugar free". That's right; no more "dashes of agave" here or "drizzles of maple syrup" there; no water-kefir made from mango syrup (sniffle); and no, no, NO glazed muffins.

But chins up, there is still a lot of room for tasty treats in the sugar-free world. I am allowing SOME fruits, just not acidic fruits. So a few apples and bananas might make it in here and there, and maybe a pear on occasion...you never know. I am also allowing some prunes at some point, because sometimes, folks, a girl's gotta do what a girl's gotta do. Otherwise, dried fruit is out for me as well.

and because Candida is a suspect here, let's make it official and chuck out yeasts, fermented foods (oh the tragedy...:( ), white rice and other refined grains and starches.

Yikes! wish me luck!

Look forward to a wealth of yummy savory and teasingly sweet recipes for the month of April. And don't forget to stay updated on the challenge by checking out the updates page here.

Read more...

Breakfast Kuzu with Quinoa-A Cure-All Treat

>> Wednesday, March 25


Ok. they're not the most beautiful photos we've ever seen,
but porridges are rarely photogenic. Have faith, it's amazing in person.


If you've ever seen an under-slept student with the flu, then you know exactly how Daniel showed up at my door one morning a few weeks ago: a little green, to say the least. He looked like an underfed stray, and he nodded at the comment (couldn't help myself), adding that in fact he hadn't been able to eat much for 3 days. I immediately flashed on an article I had read on the medicinal qualities of kuzu, a Japanese starch used for making custard-like drinks. It is foremost considered a good way to get nutritious herbs into a sick body without disturbing sensitive stomachs. Bingo!

As I'd never tried kuzu, and didn't want to miss the fun, I decided to make something palletable to healthy folk too-sort of a breakfast porridge with protein-rich quinoa, digestion-aiding spices, and lotsa love. Woweeeeee that stuff as good, and I can't believe it was healthy it tasted so sinfully sweet and yummy. You could have it as a breakfast or a light dessert, and no one would be the wiser for it.

Chai Kuzu with Quinoa
serves 2 hungry folk, or three modestly peckish chaps

3 tbsp kuzu powder
1 cup quinoa
1 cup rice milk
2 inches ginger root
5 cardamom pods
3 cloves
1/2 tsp cinnamon
1/2 tsp nutmeg
1 tbsp molasses
1 tsp agave or maple syrup
1/2 tsp vanilla extract (optional)
1 1/2 cups water

garnish of choice (optional)

Directions


Dissolve the kuzu in 1/4 cup milk and set aside.

Bring the water and quinoa to a simmer, reduce heat, cover, and let cook until the quinoa is almost done, about 15 minutes. Meanwhile, grate the ginger root and sqeeze out the juice through a tea strainer or seive, discard the solids.

Add the remaining 3/4 cup milk to the quinoa, stir, and then add the kuzu-milk, stirring well.
Add all the other ingredients except vanilla, bring to a simmer again, and continue to cook 5-10 minutes, or until well-thickened to a pudding-like consistency, stirring occasionally. If necessary, adjust the amount of milk to thin the porridge. I like mine thick :)

Serve with yogurt, kefir, chopped nuts, fruit, or a drizzle of rice milk on top. Scrumptious!

Read more...

Mustard Sprout Salad and Herb-Strewn Roasted Beets: A Light Late Lunch for Sunkissed Evenings


Some days require a little love packed in your lunch box. Yesterday, it was the way the sun incubated me through the window, slowing me down to the momentum of a boozy sunbather. I just couldn’t tolerate anything blah in that luxurious light, so I cooked a fantastic meal and served it still warm at work for an extra-special Tuesday treat.

Herb-Strewn Roasted Beets (for 1. It’s pretty easy to up the output, just add more beets!)

Ingredients
1-2 washed, whole beets, greens removed and saved for something tasty later
1 tbsp olive oil
1 tsp fresh or dried thyme
a dash of Herbamare or other herbed salt
1 tsp oregano, marjoram or thyme, or combination

Directions
Preheat the oven to 350 F (175 C)
Rub the oil onto the beets and lay them on a sheet of tinfoil. Sprinkle the thyme and a drizzle of water over them and wrap the tinfoil securely around them.
Bake for 30-40 minutes, until tender.

To serve, slice each into rings, removing the skin if you wish, and arrange overlapped on a plate. If they seem dry at all, brush or rub a drop of olive oil onto the cut surface. Dust with salt and the remaining herbs.

Very Simple Mustard Sprout Salad (for 1. Easily, easily increased, substituted, and supplemented)

Ingredients
2 tbsp mustard seed sprouts
½ small head of chicoree
1 medium carrot, grated

2 tsp wine vinegar
1 tsp sesame oil
a squeeze of lemon juice
a dash of sugar, agave, or maple syrup (optional)
a pinch of salt
a grate of pepper

Directions
Slice the chicoree into rounds and toss them with the sprouts and carrots.
Mix together the dressing ingredients and toss it all up. Fertig!

Read more...

Go Ahead honey It's Gluten Free! Sweet and Savory Canapes

>> Tuesday, March 24

chickpea crackers, peppered eggplant,
roasted red pepper tahini, and lemon,
with zatar, paprika and rosemary.
phew!

Part I: Savory Canapés


I was thrilled by this month's theme of Go Ahead Honey It's Gluten Free! which Naomi of Straight into Bed Cakefree and Dried came up with. It seemed so...easy. Yet, if you only knew what I went through to make these. Wait, let me just explain. What are in truth the easiest, simplest, and tastiest crackers in the world, and gluten free and vegan to boot, took me TWO DAYS to prepare just because I planned poorly. Yes, it was after meticulously creating my perfect first batch with the last half cup of chickpea flour that I spaced out for a few moments too long and got a pile of blackened shale in return for all my efforts. I know that the Indian shop at the train station has chickpea flour, but I have to go the other direction to work, so with one hour of free time I felt confident I could find some flour in Klein Basel on my way. Ha. Hahaha. That’s what fate was doing all yesterday, as I scoured about 15 shops for one lonely bag of chickpea flour and found none.

Thankfully, there are heroes in this world, and I happen to know one of them. Daniel stopped at one small shop, 2 blocks from his house, and came over later with a bag of chickpea flour, looking obnoxiously nonchalant. Oh yeah, the one shop he checked had it. Never mind the other 30 turkish and Indian shops in Basel that I checked…I fell asleep dreaming of chickpea cracker canapés, and the next morning we began round 2 of canapé creation from ground zero. I am very pleased to give you the result-an eastern spin on the classic French appetizer, happily allergen-free, beautiful, and tantalizing in every way.

I quote Daniel as he bit into the first: “It’s like tasting a play; each flavor has its own scene and you move through them like a story is unfolding. You start with the tangy lemon, then you get the spicy paprika, the earthy red pepper dip, and the soft eggplant taste, surrounded by the crunch of the chickpea crackers. Behind it all comes the roasted pepper again, soothing the whole experience.” The boy should be a poet, and these canapés should be muses. To give them due credit, we decided to name them after their regal appearance. Voila: Canapés Impériale

Canapés Impériale


1 batch of Gluten Free Chickpea Crackers from Susan at FatFree Vegan Kitchen
1 batch of Roasted Red Pepper Tahini (recipe below)
½ lemon
1 sprig rosemary
2 tbsp zatar
1 tbsp hot paprika
¼ eggplant
2 tbsp olive oil
2 tsp fresh ground black pepper
salt to taste

Directions
Slice the eggplant into very thin slices lengthwise, lay on a plate, and salt generously on both sides. Let sit for about 20 minutes, then rinse well.

Heat the oil in a frying pan and turn the pan to coat the bottom. Add the eggplant and dust with half the pepper. Cook until the bottom is well-browned, then turn and sprinkle the rest of the pepper. Cook over medium heat until tender, then set on a plate covered in paper towels to cool.

Meanwhile, cut the lemon half into 4 slices so that the lemon segments form little triangles. Carefully cut the segments out into a small bowl, preserving the triangular shape as you do so.

When the eggplants are cool, cut them into 1 inch squares and set one piece of eggplant on each cracker, with the corners of the eggplant in the middle of the sides of each cracker so you have a nice “pointy” thing going on.

Moisten your fingers and quickly form about ¼ tsp tahini whip into a ball and set it in the center of the eggplant. Sprinkle a pinch of zatar onto it, then place the lemon segment on top and dust with paprika. Finally, stick a single ‘leaf’ (what do you call individual little green parts on rosemary? Needles??) of rosemary into the tahini so that it arches up over the lemon. Repeat with all of them and serve.

Roasted Red Pepper Tahini

1 red bell pepper
1/3 cup tahini
2 tbsp water
pinch of salt

Directions
Preheat the oven to 350 F (175 C) and set your baking rack in the highest slot.

Wash the pepper and bake it for about 10 minutes on a tinfoil-lined baking sheet. It should be pretty charred and black on one side. Turn it and let the other side get puffy, crisp, and dark.
Remove the pepper from the oven and fold the tinfoil over it. Let it sit for 10 minutes and then open it up, remove the seeds and skin (should basically fall off) and discard them.

If you have a food processor, toss all the ingredients in there at this point. If not (Hello, my name is Erin and I am a food prep masochist. I have nothing but a mortar and pestle and I question that choice often.), chop the pepper up and then grind it into a paste in a mortar and pestle. Stir it into the tahini, add the water, and salt to taste, mixing it all until you get a fluffy, thick paste. Should be workable and smooth, but not liquid, since you want it to keep its shape on the cracker.
Although, just add some more water and a little lemon and you have a perfect chip dip, FYI.

Part II: The Sweet Tooth Trembles…


I made some red bean paste last week because we had too many kidney beans lying around. It’s fantastic on rice cakes or bread, or with yogurt or porridge, but as a singularly unique item, it begs creativity, and I felt compelled to oblige when I thought about creating a sweet canapé for this edition of Go Ahead honey. Enter: The dessert sushi. This cookie is so tasty, satisfying, and, (really) healthy that it could be your next homemade Powerbar if you just tossed in some guarana and raisins. And the presentation is, needless to say, really really cool.

Red Bean Paste
2 cups dry kidney beans
4 tbsp maple syrup
A smidge of salt. About one grain. (optional)

Soak the kidney beans overnight, drain, rinse, and cook for about 1 ½ hours, or until very tender.
Let cool, then drain and mash through a large sieve into a bowl (be patient, this takes awhile). Save the skins if you want and toss them into some other baked good, because you can ☺
Stir in the maple syrup and salt, taste, and adjust as desired.
Store in an airtight container and stir every few days in the refrigerator to keep it longer.

Dessert Sushi: AKA Redbean-Tahini Cookies


1 batch red bean paste
1 batch tahini cookie dough
1 apple
2 tbsp simple cream frosting, thinned to drippable
1 tbsp poppyseeds
(the last three are my versions, you can vary as you see fit for fillings and toppings)

Using a well-floured board and rolling pin, roll out about ½ cup cookie dough to about ¼ inch thick. Aim for a square shape (like sushi nori, right?) and trim the edges with a knife to make them straight and square.

Coat the dough with red bean paste and along one edge, lay your fillings, parallel to the edge. Fold that edge in, tucking the fillings inside as you go, and roll the pastry until you have a long cylinder. With a very sharp knife, slice the roll into 1-inch sushi sections, then set on their bottoms on a baking sheet.

Bake 15-20 minutes at about 350 F, until just barely browned and firmed.
Let cool and top as desired!

Read more...

Tahini Cookies Three Ways


There are infinite ways to finish off this recipe with your own personal touch. I fully encourage such experiments, and I offer you one of my weird variations here for a little idea of what you could do. The ground recipe is the same.

Tahini Cookie Dough
(Ground Recipe)
1/3 cup tahini
¼ cup sugar beet syrup or other syrupy sweetener
¼ cup ground hazelnuts
½ cup rice flour (plus a few tbsp)
1 tsp baking powder
1 tbsp margarine (optional)
1 tbsp water or as needed

Mix the tahini, syrup, and margarine, if using.
In a separate bowl, whisk together the dry ingredients, then add them to the wet and mix. If it is too dry to come together into a ball, add some water and try again. If it is a bit too oily (mine was, after the addition of margarine) add the extra flour.

For simple Diamond Cookies, roll the dough out on a floured board to about 1/4 inch thick and slice into diamond shapes. Then bake for about 15 minutes at 350 F (175 C), or until they are just touched with color on the edges. Careful, these over-cook quickly!

Oatmeal-Style Raisin Tahini Cookies

These involve no oats, but they sure remind me of the delicious oatmeal cookies my mom used to make...chewy, fruity, hearty, and best still warm from the oven.

To the ground recipe, add:
2 large carrots, grated
1/4 cup rice flour
1/2 cup raisins

Adjust the flour-water ratio as needed to get a thick, but workable, cookies dough.
Roll 1 tbsp of the dough into a ball, then flatten it into a cookie shape and repeat for the rest. Bake for 15-20 minutes, until lightly browned and firm enough to hold together. Let cool on a rack (barely) and enjoy :)
Also check out the directions for Dessert Sushi to see another adaptation of this ground recipe.

Read more...

Calico Kichiri and Rosemary Roasted Carrot Hash with Fresh Sprouts

>> Thursday, March 19


I looooove lentils. LOOOOOOOOVE them. All colors, shapes, sizes, and preparations. Which is probably why I can’t really manage to discriminate when it comes to creating Indian lentil dishes. Kichiri is ‘supposed’ to be made with red lentils, which is fantastic, but I wanted black lentils today, so that’s what I made. Continuing the blasphemy, I added nutritional yeast to imitate the consistency of red lentils. Recipe-sticklers beware, it was sinfully good and I don’t regret a moment of it.

The roasted carrot hash was half glorious inspiration and half poor planning-Having seen the roasted carrot dip on Just Bento, I thought it would be a perfect spread for the yummy cornbread my roommate just cooked up. After roasting the carrots, I remembered for the 100th time that we broke the food processor a few months ago. Huh. Carrots are not very mortar and pestle friendly. I used a bread knife to hack them into tiny pieces, and tried anyway, but the slippery little suckers still evaded all mushing attempts and just squirmed around my mortar mischieviously. Confounded, I tossed them into a bowl and drizzled balsamic vinegar and bragg’s over them, tossed, and tasted-WOAH that’s good!


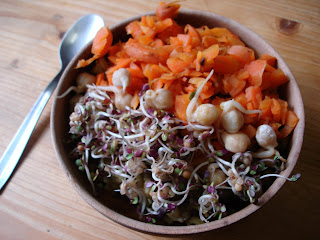
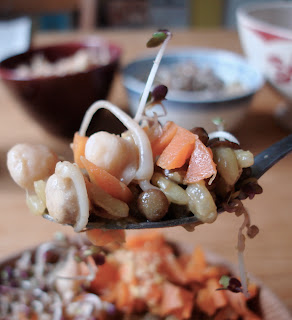
The mustard sprouts and steamed chickpea sprouts really topped off the simple kichiri and tangy carrots. I steamed the chickpea sprouts for about 10 minutes on the lowest heat to get them tender and served them still warm over everything. So-oh-ohhhhh good. I ate two helpings and packed more for dinner, because with this good of a taste, repetition is a blessing!

Note: for the record, this meal was so satisfying I couldn’t manage to eat any more for dinner. The magic of sprouts, veggies, lentils and rice is that it’s absolutely everything you need and want, all in one delectable bowl.

Calico Kichiri


Ingredients
1 leek, sliced into rounds
1 small red onion, roughly chopped
1 cup brown rice, long or short grain
¾ cup beluga lentils
3 cups water

½ tsp cardamom powder, or 4 whole pods
1 tsp turmeric powder
3 cloves garlic, chopped (or some garlic powder-I admit it, I used powder today…)
1 tsp finely chopped ginger root
1 tbsp nutritional yeast
½ tsp cinnamon powder
2 tbsp oil

Directions
  1. Heat the oil in a saucepan over medium-low heat and add the onions and leek. Cook, stirring, until they are tender and shiny.
  2. Add the spices, garlic and ginger, continuing to stir. Scrape the bottom of the pan if it starts to stick, and just keep stirring for about a minute.
  3. Add the lentils and rice, still stirring, for 1 more minute.
  4. Add the water, cover, bring to a boil, and reduce heat. Cook for 30 minutes or until almost all the water is absorbed and everything is fully cooked.
  5. Stir in the nutritional yeast. There should be a little liquid left to create a saucy consistency with the yeast-if needed, add a drop more water, and you will get a wonderfully thick mush as it cools on the plate, stiff enough to stay on the spoon when you turn it sideways.comfort food consistency!

Rosemary Roasted Carrot Hash

Ingredients
4 carrots
1 very large sprig of rosemary
a pinch of salt
2 tsp bragg’s or tamari
2 tsp balsamic vinegar

Directions

Preheat the oven to 350 F (175 C).
Wash the carrots and chop them into large chunks. Sprinkle them with a bit of salt, set the rosemary on top, and wrap it all in a piece of foil. Bake for 30 minutes, or until tender.

After they have cooled for a moment, use a large knife to dice the carrots into very small pieces. Minced might be the word. Toss them with the vinegar and bragg's and serve over or beside your main course, warm or cool. In the summer, we’ll have to revisit this with fresh basil leaves chopped up in it…

Read more...

Spicy Chickpea Salad (makes heaps)

>> Wednesday, March 18


“How about hummus?”
“I don’t know, it’s such a pain, and we don’t have a food processor.”
“Ok, just a tahini dip.”
“Ok, good.”

Yet later that night, preparing everything for the yoga and brunch workshop, I felt that hummus was necessary. It was obviously a delirium-induced conclusion, because as I finished cooking the chickpeas early the next morning, I knew immediately that we had too much food and not enough time to make 400 grams of chickpeas into hummus with a mortar and pestle.

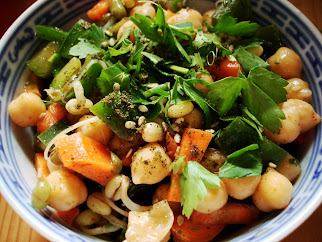
Hurrah for mistakes, because the resulting salad is a very welcome addition to my recipe collection. I have been enjoying (a lot of) it by itself or tossed with fresh greens. Actually, if you wanted to, you even COULD toss it all in a food processor and make hummus after all!

In fact, I am thinking that later this week some falafel might grown where the salad was planted...I'll keep ya posted.

Spicy Chickpea Salad

Ingredients

4 cups cooked chickpeas
1 large green bell pepper
4 carrots
1 cup mung bean sprouts
½ cup chopped parsley (plus 2 tbsp garnish)

Juice of 1 lemon
2 cloves garlic
½ inch ginger root
2 tbsp miso paste
salt and pepper to taste
2 tbsp bragg’s/tamari
½ cup oil
½ cup white wine vinegar
¼ cup water kefir or some water + another vinegar of choice + a dash of sugar
1 tsp hot paprika
1 tbsp zatar (plus 2 tbsp garnish)

Directions

Chop the bell pepper and carrots into small chunks.
Into a large jar, grate the ginger and garlic. Add the other dressing ingredients, mix, and pour over the salad. Let it sit for an hour or two in the fridge before serving, then garnish with the zatar and parsley.

Read more...

NorCal Dolmas (and no-waste rice milk!)

>> Tuesday, March 17

Fresh, sticky dolma filling

Of all the teachers I’ve had in my life, a few of them stand out like gold embossing in my memory. One of these radiant individuals is Jon, the counselor from my high school. He and his wife, my art teacher, are two of the spunkiest folks I’ve ever met, and the things I’ve learned from them go a long way past the classroom. Like, for example, into the kitchen. Before moving into teaching, they ran a little restaurant in California and the cooking bug as never left them as far as I can tell.

Last summer, as Sheri scrambled to finish a huge multimedia piece for her art show (that night-artistic procrastination at its best), Jon entered the kitchen with an armload of groceries and a determined jut to his jaw. “We’ve gotta make a lot of food,” he informed Daniel and I, and, wow, did we ever.

I recalled all this last week as I prepared for the Yoga and brunch workshop at B.Yoga Basel. with a bunch of yogis to feed, Jon’s dolmas sprang to mind immediately as an easy, tasty, and for some reason ‘impressive’ dish that I could bring. Everyone likes dolmas. Not just for soulful combo of tangy lemon and spiced rice, but there’s something about the presentation of it all in a slick green grape leaf that makes you think, “I am dining exactly as Caesar would have dined, and for that, I am magnificent.”
Enjoy the illusion of grandeur; just don’t tell them how easy it was to make them. I didn’t manage to get a picture, but I think that’s a fairly good selling point, don’t you?


NorCal Dolmas (makes about 60)
This recipe is modified to simultaneously cook the rice and make rice milk which is not necessary, but COOL. See the notes section for more information on alternative methods and the who-what-why's...

Ingredients
1 jar grape leaves (preferably without the “acidity regulators” and “E-whatevers”)
5 cups short grain brown rice, soaked overnight in twice as much water
3 lemons
400 grams raisins, finely chopped
lotsa cinnamon
a pinch of salt
a grate or two of nutmeg (if you’re feelin’ lucky)
¼ cup olive oil (hugely flexible amount)

Directions
  1. Without straining or rinsing, add 2 cups of water to the rice and cook, covered, until tender.
  2. Strain the rice and set aside the liquid (add a tiny pinch of salt and some sugar and you have rice milk! Now that was easy!)
  3. To the rice, add the raisins, cinnamon, salt, and nutmeg. Stir it all up and be ruthless so the consistency gets good and gooey. You want it to be self-adhesive so it doesn’t crumble when you bite into the dolma.
  4. Add the grated zest and juice of 1 lemon at a time, tasting after each one to make sure it’s not too sour. Adjust the spices to taste. If needed, add a little bit of the rice milk to get the stickiness level up.
  5. Drain the leaves and unfold them on a clean plate. Taste a broken one (there’s always at least one) to make sure it’s not too salty or acidic, and rinse them quickly if it is. If they aren’t flavorful enough, add a dash of apple cider vinegar to the rice mixture.
  6. Pour a tablespoon of oil onto another plate, set a leaf in the oil with the vein-ey side up and the stem facing you, and push the leaf around to coat the plate in oil. Depending on the size of the leaf, fill it with about 2 TBSP filling, fold up the bottom, tuck in the sides, and roll it to the top. Voila!
  7. Repeat until the oil is gone and add another tablespoon of oil. A nice touch is to add some sliced lemon-rounds.
Notes
The directions here say to soak the rice. This increases digestibility whether you choose to do the rice milk thing or not, and I recommend soaking all grains overnight before cooking for this reason. Here, the soaking also induces some milky qualities in the water that let us make rice milk later by adding some extra water. Thus, you have 3 choices here:
You can
1) Follow the above directions for rice milk and rice
2) Soak the rice but skip the additional water and straining process, giving you really stomach-friendly rice, which might be nice with all the dried fruit going on here, OR
3) Cook the rice like most people cook rice-stick it in a pot with some water and just cook it, no soaking, no extra water weirdness, no random milk biproduct. Your choice!

Read more...

  © Blogger templates Shiny by Ourblogtemplates.com 2008

Back to TOP