Breakfast Kuzu with Quinoa-A Cure-All Treat

>> Wednesday, March 25


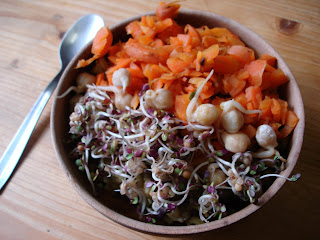
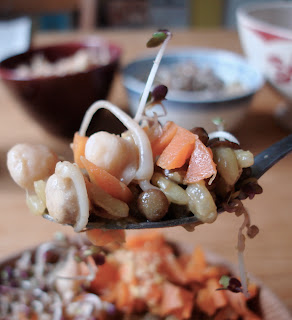
Ok. they're not the most beautiful photos we've ever seen,
but porridges are rarely photogenic. Have faith, it's amazing in person.


If you've ever seen an under-slept student with the flu, then you know exactly how Daniel showed up at my door one morning a few weeks ago: a little green, to say the least. He looked like an underfed stray, and he nodded at the comment (couldn't help myself), adding that in fact he hadn't been able to eat much for 3 days. I immediately flashed on an article I had read on the medicinal qualities of kuzu, a Japanese starch used for making custard-like drinks. It is foremost considered a good way to get nutritious herbs into a sick body without disturbing sensitive stomachs. Bingo!

As I'd never tried kuzu, and didn't want to miss the fun, I decided to make something palletable to healthy folk too-sort of a breakfast porridge with protein-rich quinoa, digestion-aiding spices, and lotsa love. Woweeeeee that stuff as good, and I can't believe it was healthy it tasted so sinfully sweet and yummy. You could have it as a breakfast or a light dessert, and no one would be the wiser for it.

Chai Kuzu with Quinoa
serves 2 hungry folk, or three modestly peckish chaps

3 tbsp kuzu powder
1 cup quinoa
1 cup rice milk
2 inches ginger root
5 cardamom pods
3 cloves
1/2 tsp cinnamon
1/2 tsp nutmeg
1 tbsp molasses
1 tsp agave or maple syrup
1/2 tsp vanilla extract (optional)
1 1/2 cups water

garnish of choice (optional)

Directions


Dissolve the kuzu in 1/4 cup milk and set aside.

Bring the water and quinoa to a simmer, reduce heat, cover, and let cook until the quinoa is almost done, about 15 minutes. Meanwhile, grate the ginger root and sqeeze out the juice through a tea strainer or seive, discard the solids.

Add the remaining 3/4 cup milk to the quinoa, stir, and then add the kuzu-milk, stirring well.
Add all the other ingredients except vanilla, bring to a simmer again, and continue to cook 5-10 minutes, or until well-thickened to a pudding-like consistency, stirring occasionally. If necessary, adjust the amount of milk to thin the porridge. I like mine thick :)

Serve with yogurt, kefir, chopped nuts, fruit, or a drizzle of rice milk on top. Scrumptious!

Read more...

Mustard Sprout Salad and Herb-Strewn Roasted Beets: A Light Late Lunch for Sunkissed Evenings


Some days require a little love packed in your lunch box. Yesterday, it was the way the sun incubated me through the window, slowing me down to the momentum of a boozy sunbather. I just couldn’t tolerate anything blah in that luxurious light, so I cooked a fantastic meal and served it still warm at work for an extra-special Tuesday treat.

Herb-Strewn Roasted Beets (for 1. It’s pretty easy to up the output, just add more beets!)

Ingredients
1-2 washed, whole beets, greens removed and saved for something tasty later
1 tbsp olive oil
1 tsp fresh or dried thyme
a dash of Herbamare or other herbed salt
1 tsp oregano, marjoram or thyme, or combination

Directions
Preheat the oven to 350 F (175 C)
Rub the oil onto the beets and lay them on a sheet of tinfoil. Sprinkle the thyme and a drizzle of water over them and wrap the tinfoil securely around them.
Bake for 30-40 minutes, until tender.

To serve, slice each into rings, removing the skin if you wish, and arrange overlapped on a plate. If they seem dry at all, brush or rub a drop of olive oil onto the cut surface. Dust with salt and the remaining herbs.

Very Simple Mustard Sprout Salad (for 1. Easily, easily increased, substituted, and supplemented)

Ingredients
2 tbsp mustard seed sprouts
½ small head of chicoree
1 medium carrot, grated

2 tsp wine vinegar
1 tsp sesame oil
a squeeze of lemon juice
a dash of sugar, agave, or maple syrup (optional)
a pinch of salt
a grate of pepper

Directions
Slice the chicoree into rounds and toss them with the sprouts and carrots.
Mix together the dressing ingredients and toss it all up. Fertig!

Read more...

Go Ahead honey It's Gluten Free! Sweet and Savory Canapes

>> Tuesday, March 24

chickpea crackers, peppered eggplant,
roasted red pepper tahini, and lemon,
with zatar, paprika and rosemary.
phew!

Part I: Savory Canapés


I was thrilled by this month's theme of Go Ahead Honey It's Gluten Free! which Naomi of Straight into Bed Cakefree and Dried came up with. It seemed so...easy. Yet, if you only knew what I went through to make these. Wait, let me just explain. What are in truth the easiest, simplest, and tastiest crackers in the world, and gluten free and vegan to boot, took me TWO DAYS to prepare just because I planned poorly. Yes, it was after meticulously creating my perfect first batch with the last half cup of chickpea flour that I spaced out for a few moments too long and got a pile of blackened shale in return for all my efforts. I know that the Indian shop at the train station has chickpea flour, but I have to go the other direction to work, so with one hour of free time I felt confident I could find some flour in Klein Basel on my way. Ha. Hahaha. That’s what fate was doing all yesterday, as I scoured about 15 shops for one lonely bag of chickpea flour and found none.

Thankfully, there are heroes in this world, and I happen to know one of them. Daniel stopped at one small shop, 2 blocks from his house, and came over later with a bag of chickpea flour, looking obnoxiously nonchalant. Oh yeah, the one shop he checked had it. Never mind the other 30 turkish and Indian shops in Basel that I checked…I fell asleep dreaming of chickpea cracker canapés, and the next morning we began round 2 of canapé creation from ground zero. I am very pleased to give you the result-an eastern spin on the classic French appetizer, happily allergen-free, beautiful, and tantalizing in every way.

I quote Daniel as he bit into the first: “It’s like tasting a play; each flavor has its own scene and you move through them like a story is unfolding. You start with the tangy lemon, then you get the spicy paprika, the earthy red pepper dip, and the soft eggplant taste, surrounded by the crunch of the chickpea crackers. Behind it all comes the roasted pepper again, soothing the whole experience.” The boy should be a poet, and these canapés should be muses. To give them due credit, we decided to name them after their regal appearance. Voila: Canapés Impériale

Canapés Impériale


1 batch of Gluten Free Chickpea Crackers from Susan at FatFree Vegan Kitchen
1 batch of Roasted Red Pepper Tahini (recipe below)
½ lemon
1 sprig rosemary
2 tbsp zatar
1 tbsp hot paprika
¼ eggplant
2 tbsp olive oil
2 tsp fresh ground black pepper
salt to taste

Directions
Slice the eggplant into very thin slices lengthwise, lay on a plate, and salt generously on both sides. Let sit for about 20 minutes, then rinse well.

Heat the oil in a frying pan and turn the pan to coat the bottom. Add the eggplant and dust with half the pepper. Cook until the bottom is well-browned, then turn and sprinkle the rest of the pepper. Cook over medium heat until tender, then set on a plate covered in paper towels to cool.

Meanwhile, cut the lemon half into 4 slices so that the lemon segments form little triangles. Carefully cut the segments out into a small bowl, preserving the triangular shape as you do so.

When the eggplants are cool, cut them into 1 inch squares and set one piece of eggplant on each cracker, with the corners of the eggplant in the middle of the sides of each cracker so you have a nice “pointy” thing going on.

Moisten your fingers and quickly form about ¼ tsp tahini whip into a ball and set it in the center of the eggplant. Sprinkle a pinch of zatar onto it, then place the lemon segment on top and dust with paprika. Finally, stick a single ‘leaf’ (what do you call individual little green parts on rosemary? Needles??) of rosemary into the tahini so that it arches up over the lemon. Repeat with all of them and serve.

Roasted Red Pepper Tahini

1 red bell pepper
1/3 cup tahini
2 tbsp water
pinch of salt

Directions
Preheat the oven to 350 F (175 C) and set your baking rack in the highest slot.

Wash the pepper and bake it for about 10 minutes on a tinfoil-lined baking sheet. It should be pretty charred and black on one side. Turn it and let the other side get puffy, crisp, and dark.
Remove the pepper from the oven and fold the tinfoil over it. Let it sit for 10 minutes and then open it up, remove the seeds and skin (should basically fall off) and discard them.

If you have a food processor, toss all the ingredients in there at this point. If not (Hello, my name is Erin and I am a food prep masochist. I have nothing but a mortar and pestle and I question that choice often.), chop the pepper up and then grind it into a paste in a mortar and pestle. Stir it into the tahini, add the water, and salt to taste, mixing it all until you get a fluffy, thick paste. Should be workable and smooth, but not liquid, since you want it to keep its shape on the cracker.
Although, just add some more water and a little lemon and you have a perfect chip dip, FYI.

Part II: The Sweet Tooth Trembles…


I made some red bean paste last week because we had too many kidney beans lying around. It’s fantastic on rice cakes or bread, or with yogurt or porridge, but as a singularly unique item, it begs creativity, and I felt compelled to oblige when I thought about creating a sweet canapé for this edition of Go Ahead honey. Enter: The dessert sushi. This cookie is so tasty, satisfying, and, (really) healthy that it could be your next homemade Powerbar if you just tossed in some guarana and raisins. And the presentation is, needless to say, really really cool.

Red Bean Paste
2 cups dry kidney beans
4 tbsp maple syrup
A smidge of salt. About one grain. (optional)

Soak the kidney beans overnight, drain, rinse, and cook for about 1 ½ hours, or until very tender.
Let cool, then drain and mash through a large sieve into a bowl (be patient, this takes awhile). Save the skins if you want and toss them into some other baked good, because you can ☺
Stir in the maple syrup and salt, taste, and adjust as desired.
Store in an airtight container and stir every few days in the refrigerator to keep it longer.

Dessert Sushi: AKA Redbean-Tahini Cookies


1 batch red bean paste
1 batch tahini cookie dough
1 apple
2 tbsp simple cream frosting, thinned to drippable
1 tbsp poppyseeds
(the last three are my versions, you can vary as you see fit for fillings and toppings)

Using a well-floured board and rolling pin, roll out about ½ cup cookie dough to about ¼ inch thick. Aim for a square shape (like sushi nori, right?) and trim the edges with a knife to make them straight and square.

Coat the dough with red bean paste and along one edge, lay your fillings, parallel to the edge. Fold that edge in, tucking the fillings inside as you go, and roll the pastry until you have a long cylinder. With a very sharp knife, slice the roll into 1-inch sushi sections, then set on their bottoms on a baking sheet.

Bake 15-20 minutes at about 350 F, until just barely browned and firmed.
Let cool and top as desired!

Read more...

Tahini Cookies Three Ways


There are infinite ways to finish off this recipe with your own personal touch. I fully encourage such experiments, and I offer you one of my weird variations here for a little idea of what you could do. The ground recipe is the same.

Tahini Cookie Dough
(Ground Recipe)
1/3 cup tahini
¼ cup sugar beet syrup or other syrupy sweetener
¼ cup ground hazelnuts
½ cup rice flour (plus a few tbsp)
1 tsp baking powder
1 tbsp margarine (optional)
1 tbsp water or as needed

Mix the tahini, syrup, and margarine, if using.
In a separate bowl, whisk together the dry ingredients, then add them to the wet and mix. If it is too dry to come together into a ball, add some water and try again. If it is a bit too oily (mine was, after the addition of margarine) add the extra flour.

For simple Diamond Cookies, roll the dough out on a floured board to about 1/4 inch thick and slice into diamond shapes. Then bake for about 15 minutes at 350 F (175 C), or until they are just touched with color on the edges. Careful, these over-cook quickly!

Oatmeal-Style Raisin Tahini Cookies

These involve no oats, but they sure remind me of the delicious oatmeal cookies my mom used to make...chewy, fruity, hearty, and best still warm from the oven.

To the ground recipe, add:
2 large carrots, grated
1/4 cup rice flour
1/2 cup raisins

Adjust the flour-water ratio as needed to get a thick, but workable, cookies dough.
Roll 1 tbsp of the dough into a ball, then flatten it into a cookie shape and repeat for the rest. Bake for 15-20 minutes, until lightly browned and firm enough to hold together. Let cool on a rack (barely) and enjoy :)
Also check out the directions for Dessert Sushi to see another adaptation of this ground recipe.

Read more...

Calico Kichiri and Rosemary Roasted Carrot Hash with Fresh Sprouts

>> Thursday, March 19


I looooove lentils. LOOOOOOOOVE them. All colors, shapes, sizes, and preparations. Which is probably why I can’t really manage to discriminate when it comes to creating Indian lentil dishes. Kichiri is ‘supposed’ to be made with red lentils, which is fantastic, but I wanted black lentils today, so that’s what I made. Continuing the blasphemy, I added nutritional yeast to imitate the consistency of red lentils. Recipe-sticklers beware, it was sinfully good and I don’t regret a moment of it.

The roasted carrot hash was half glorious inspiration and half poor planning-Having seen the roasted carrot dip on Just Bento, I thought it would be a perfect spread for the yummy cornbread my roommate just cooked up. After roasting the carrots, I remembered for the 100th time that we broke the food processor a few months ago. Huh. Carrots are not very mortar and pestle friendly. I used a bread knife to hack them into tiny pieces, and tried anyway, but the slippery little suckers still evaded all mushing attempts and just squirmed around my mortar mischieviously. Confounded, I tossed them into a bowl and drizzled balsamic vinegar and bragg’s over them, tossed, and tasted-WOAH that’s good!


The mustard sprouts and steamed chickpea sprouts really topped off the simple kichiri and tangy carrots. I steamed the chickpea sprouts for about 10 minutes on the lowest heat to get them tender and served them still warm over everything. So-oh-ohhhhh good. I ate two helpings and packed more for dinner, because with this good of a taste, repetition is a blessing!

Note: for the record, this meal was so satisfying I couldn’t manage to eat any more for dinner. The magic of sprouts, veggies, lentils and rice is that it’s absolutely everything you need and want, all in one delectable bowl.

Calico Kichiri


Ingredients
1 leek, sliced into rounds
1 small red onion, roughly chopped
1 cup brown rice, long or short grain
¾ cup beluga lentils
3 cups water

½ tsp cardamom powder, or 4 whole pods
1 tsp turmeric powder
3 cloves garlic, chopped (or some garlic powder-I admit it, I used powder today…)
1 tsp finely chopped ginger root
1 tbsp nutritional yeast
½ tsp cinnamon powder
2 tbsp oil

Directions
  1. Heat the oil in a saucepan over medium-low heat and add the onions and leek. Cook, stirring, until they are tender and shiny.
  2. Add the spices, garlic and ginger, continuing to stir. Scrape the bottom of the pan if it starts to stick, and just keep stirring for about a minute.
  3. Add the lentils and rice, still stirring, for 1 more minute.
  4. Add the water, cover, bring to a boil, and reduce heat. Cook for 30 minutes or until almost all the water is absorbed and everything is fully cooked.
  5. Stir in the nutritional yeast. There should be a little liquid left to create a saucy consistency with the yeast-if needed, add a drop more water, and you will get a wonderfully thick mush as it cools on the plate, stiff enough to stay on the spoon when you turn it sideways.comfort food consistency!

Rosemary Roasted Carrot Hash

Ingredients
4 carrots
1 very large sprig of rosemary
a pinch of salt
2 tsp bragg’s or tamari
2 tsp balsamic vinegar

Directions

Preheat the oven to 350 F (175 C).
Wash the carrots and chop them into large chunks. Sprinkle them with a bit of salt, set the rosemary on top, and wrap it all in a piece of foil. Bake for 30 minutes, or until tender.

After they have cooled for a moment, use a large knife to dice the carrots into very small pieces. Minced might be the word. Toss them with the vinegar and bragg's and serve over or beside your main course, warm or cool. In the summer, we’ll have to revisit this with fresh basil leaves chopped up in it…

Read more...

Spicy Chickpea Salad (makes heaps)

>> Wednesday, March 18


“How about hummus?”
“I don’t know, it’s such a pain, and we don’t have a food processor.”
“Ok, just a tahini dip.”
“Ok, good.”

Yet later that night, preparing everything for the yoga and brunch workshop, I felt that hummus was necessary. It was obviously a delirium-induced conclusion, because as I finished cooking the chickpeas early the next morning, I knew immediately that we had too much food and not enough time to make 400 grams of chickpeas into hummus with a mortar and pestle.

Hurrah for mistakes, because the resulting salad is a very welcome addition to my recipe collection. I have been enjoying (a lot of) it by itself or tossed with fresh greens. Actually, if you wanted to, you even COULD toss it all in a food processor and make hummus after all!

In fact, I am thinking that later this week some falafel might grown where the salad was planted...I'll keep ya posted.

Spicy Chickpea Salad

Ingredients

4 cups cooked chickpeas
1 large green bell pepper
4 carrots
1 cup mung bean sprouts
½ cup chopped parsley (plus 2 tbsp garnish)

Juice of 1 lemon
2 cloves garlic
½ inch ginger root
2 tbsp miso paste
salt and pepper to taste
2 tbsp bragg’s/tamari
½ cup oil
½ cup white wine vinegar
¼ cup water kefir or some water + another vinegar of choice + a dash of sugar
1 tsp hot paprika
1 tbsp zatar (plus 2 tbsp garnish)

Directions

Chop the bell pepper and carrots into small chunks.
Into a large jar, grate the ginger and garlic. Add the other dressing ingredients, mix, and pour over the salad. Let it sit for an hour or two in the fridge before serving, then garnish with the zatar and parsley.

Read more...

NorCal Dolmas (and no-waste rice milk!)

>> Tuesday, March 17

Fresh, sticky dolma filling

Of all the teachers I’ve had in my life, a few of them stand out like gold embossing in my memory. One of these radiant individuals is Jon, the counselor from my high school. He and his wife, my art teacher, are two of the spunkiest folks I’ve ever met, and the things I’ve learned from them go a long way past the classroom. Like, for example, into the kitchen. Before moving into teaching, they ran a little restaurant in California and the cooking bug as never left them as far as I can tell.

Last summer, as Sheri scrambled to finish a huge multimedia piece for her art show (that night-artistic procrastination at its best), Jon entered the kitchen with an armload of groceries and a determined jut to his jaw. “We’ve gotta make a lot of food,” he informed Daniel and I, and, wow, did we ever.

I recalled all this last week as I prepared for the Yoga and brunch workshop at B.Yoga Basel. with a bunch of yogis to feed, Jon’s dolmas sprang to mind immediately as an easy, tasty, and for some reason ‘impressive’ dish that I could bring. Everyone likes dolmas. Not just for soulful combo of tangy lemon and spiced rice, but there’s something about the presentation of it all in a slick green grape leaf that makes you think, “I am dining exactly as Caesar would have dined, and for that, I am magnificent.”
Enjoy the illusion of grandeur; just don’t tell them how easy it was to make them. I didn’t manage to get a picture, but I think that’s a fairly good selling point, don’t you?


NorCal Dolmas (makes about 60)
This recipe is modified to simultaneously cook the rice and make rice milk which is not necessary, but COOL. See the notes section for more information on alternative methods and the who-what-why's...

Ingredients
1 jar grape leaves (preferably without the “acidity regulators” and “E-whatevers”)
5 cups short grain brown rice, soaked overnight in twice as much water
3 lemons
400 grams raisins, finely chopped
lotsa cinnamon
a pinch of salt
a grate or two of nutmeg (if you’re feelin’ lucky)
¼ cup olive oil (hugely flexible amount)

Directions
  1. Without straining or rinsing, add 2 cups of water to the rice and cook, covered, until tender.
  2. Strain the rice and set aside the liquid (add a tiny pinch of salt and some sugar and you have rice milk! Now that was easy!)
  3. To the rice, add the raisins, cinnamon, salt, and nutmeg. Stir it all up and be ruthless so the consistency gets good and gooey. You want it to be self-adhesive so it doesn’t crumble when you bite into the dolma.
  4. Add the grated zest and juice of 1 lemon at a time, tasting after each one to make sure it’s not too sour. Adjust the spices to taste. If needed, add a little bit of the rice milk to get the stickiness level up.
  5. Drain the leaves and unfold them on a clean plate. Taste a broken one (there’s always at least one) to make sure it’s not too salty or acidic, and rinse them quickly if it is. If they aren’t flavorful enough, add a dash of apple cider vinegar to the rice mixture.
  6. Pour a tablespoon of oil onto another plate, set a leaf in the oil with the vein-ey side up and the stem facing you, and push the leaf around to coat the plate in oil. Depending on the size of the leaf, fill it with about 2 TBSP filling, fold up the bottom, tuck in the sides, and roll it to the top. Voila!
  7. Repeat until the oil is gone and add another tablespoon of oil. A nice touch is to add some sliced lemon-rounds.
Notes
The directions here say to soak the rice. This increases digestibility whether you choose to do the rice milk thing or not, and I recommend soaking all grains overnight before cooking for this reason. Here, the soaking also induces some milky qualities in the water that let us make rice milk later by adding some extra water. Thus, you have 3 choices here:
You can
1) Follow the above directions for rice milk and rice
2) Soak the rice but skip the additional water and straining process, giving you really stomach-friendly rice, which might be nice with all the dried fruit going on here, OR
3) Cook the rice like most people cook rice-stick it in a pot with some water and just cook it, no soaking, no extra water weirdness, no random milk biproduct. Your choice!

Read more...
Sundried Tomato and Black Olive Dip

>> Sunday, March 15


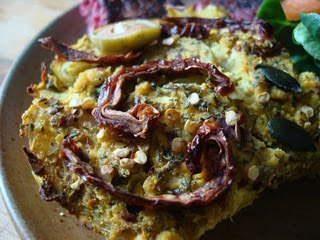
So easy, so good. We had this at a Yoga and Brunch workshop this weekend and I managed to snap a quick picture just before the bowl was scraped clean. It's fantastic on chips, salads, bread, or even over pasta or rice as a creamy vegan sauce.

Ingredients

  • 1/2 cup finely chopped sun dried tomato halves (not in oil)
  • juice of 1 lemon
  • 1/4 cup finely chopped black/greek olives
  • salt to taste (careful, the tomatoes are salty!)
  • 1/2 tsp ground black pepper
  • 1 tsp hot paprika
  • 1 clove garlic, pressed or grated
  • 2 cups soy yogurt/kefir
  • 3 tbsp chopped parlsey

Directions
  1. Mix the lemon juice and sun dried tomatoes in a bowl, stir, and let them sit for a moment until the tomatoes are softened.
  2. Add the rest of the ingredients, mix, cover, and chill until you're ready to serve.
Notes

For a thicker variation, which could be used as a thick spread, strain the yogurt before adding it by hanging it in a cheesecloth overnight. Check out this recipe for help with instructions.

Read more...
My Legume Love Affair: Royal Purple Baked Beans

>> Monday, March 9


This is my entry for "
My Legume Love Affair," hosted this month by Laurie at Mediterranean Cooking in Alaska. Much thanks to Susan from The Well-Seasoned Cook for creating MLLA, which you can find in more detail here.

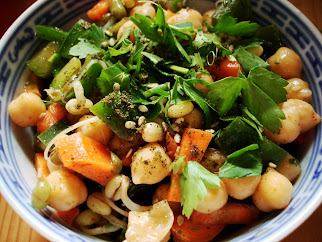
I don’t know how to explain properly the desire for beans I feel sometimes, but the word “tempestuous” comes close. And so it was with immediate enthrall that I began creating a recipe for “My Legume Love Affair” this month. In the end, I can’t give you my usual cultural, regional, health, or any other reasons for the things I have included. They just sounded really good. I started with a bag of dried black beans and some onions from the Tschumi farm, which I know from experience are too delicious to chop up when you have the chance to eat them roasted whole. Before I knew it, I had a casserole dish of baked beans gone decidedly sultry. That, my friend, is just how I roll.

Royal Purple Baked Beans

Ingredients:
2 cups dried black beans
8 small yellow onions, peeled
1 medium beet, washed and peeled into strips
1 large leek
10-15 sundried tomatoes, chopped
5 cloves garlic, slivered

½ cup rice milk
1 can tomato puree or stewed tomatoes, or some fresh tomatoes, chopped up
1 tbsp maple syrup
3 tbsp molasses
½ tsp pepper
1 tsp spicy paprika
1 tsp soy sauce, tamari, or bragg’s
2 tbsp chopped rosemary
½ tsp cinnamon
¼ tsp nutmeg
1 tsp mustard seeds
½ tsp sea salt
1 tsp balsamic vinegar
1 tbsp canola oil

either 1/4 cup celeriac juice or ½ head celeriac, grated, plus a few tbsp rice milk

Directions:

  1. Soak the beans overnight, drain, rinse, and cook with a piece of kombu seaweed for 1 to 1 ½ hours, or until tender. Cool and drain.
  2. Chop half the leek into rings and slice the remaining half lengthwise. Set aside the strips for the top, and mix together the leek rings, sundried tomatoes, garlic, beet, and beans.
  3. Combine everything in the second section and pour over the beans. stir together and toss it in the casserole dish.
  4. Place the onions and leek strips on top as desired, cover with foil and bake at 350 F (175 C) for about 40 minutes, until the beets are tender, the onions are soft, and the sauce is thickish.
  5. YUM.

Serving idea: garnish with luscious tahini whip, which is not only tasty and beautiful, but makes this meal all-the-more nutritious cuz o’ the combination of tahini and beans. ok, we didn’t make it all the way without some nutritional information, my apologies. Now back to savoring that bowl of goodness in front of you.

Read more...

  © Blogger templates Shiny by Ourblogtemplates.com 2008

Back to TOP