Showing posts with label vegan. Show all posts

More Lentil Balls

>> Sunday, April 12

Every time I get lost in my kitchen, I cast out in the darkness for a helping hand and who do I find?  My good friend Beluga.  Beluga Lentil, that is, and he never ceases to amaze me with his solutions to my ponderings, as in today's :'what can an anti-candida, gluten-free vegan eat?


Answer: More lentils.  In ball form, they look less like lentils, which is good, because i'm starting to see them even with my eyes closed this week.  These, however, could be falafel with a suntan, and I didn't think once about the fact that I was eating lentils.  Again.

Simple Double-Lentil Balls

I was out of lemons, but I think a litle lemon juice in here would have been fantastic. For non-ACD eaters, add a splash each of apple cider vinegar and braggs for some kick.

1 cup beluga lentils
1 cup red lentils
1/2 cup amaranth

1 leek or onion, chopped
1 turnip, grated
1 tsp pepper
1 tsp salt
1/2 tsp turmeric
2 tbsp fresh chopped rosemary
6 cloves garlic, chopped

2 tbsp sesame oil
1-4 cup pumpkin seeds

Add 3 cups of water to the lentils and amaranth in a saucepan.  Bring to a boil, cover, and cook until the water is absorbed and the red lentils have broken down (add more water if necessary).  Stir vigorously and cook until the mix is very thick and sticky. 

stir in the rest of the ingredients, reserving the oil and pumpkin seeds.  Mix together into a thick dough.  Roll about 2 tbsp of dough into a ball, brush with oil, and stick 2 pumpkin seeds into the top.  Place on a parchment-lined or grased baking sheet and repeat until you used it all. Bake for about 30 minutes, until browned and crispy on the inside.  

Serve with Lemon Zatar Yogurt Dressing or Luscious Tahini Whip for a protein-ilicious vegan main dish.  Or, toss with rice noodles and tomato sauce and you have spaghetti and meatballs!

Read more...

Tonsa Pho-n: Vegan Miso Pho

>> Wednesday, April 1

A sea of veggies

With a surprise below

It's a terrible pun, but it's still funny if you know that 'pho', the name of the classic Korean noodle soup, is actually said "fuh". It is. It's also known for its masses of meaty ingredients-from meat stock to chunks of beef, chicken, shrimp, octopus, squid, mussels, egg, pork, and crab. In California restaurants, there is always a vegetarian option too, but I have no idea how they manage to replicate the amazing broth flavor of traditional pho. I looked up some recipes the other day, and it seems complicated. I'm intimidated by complicated asian recipes becaus eI don't know which boundaries to respect. But I happen to know another soup-loving asian country with very easy recipes: Japan. Erin's gone all trigger-happy with the miso again.

This soup is absolutely the most satisfying, umame-loaded bowl of deeeelish I've made. I just ate it for lunch 3 days in a row. It's not exactly like pho yet, I have to perfect the faux-pho taste (somone stop me), but it's so good you won't care. And you know what, if you are a bento fan, this is a great bento meal. You can easily take along a bowl already made with a side container of chopped mint leaves, onions, chives, chilis, sprouts, or any of the other magnificent pho toppings out there. For those of you with access to a kichen at work, just take the ingredients and enjoy the zen-like process of finely slicing your leeks and ginger root next to all the fools with Campbell's soup cups. You won't notice the funny looks, because the tendency when eating perfect food is to, er, pho-get the world around you...

Vegan Miso Pho (for 1 medium-large lunch. I couldn't finish it all!)
I brought the ingredients to work and made mine there: I premixed the spices, brought the portions of whole veggies, garlic, and onion, and stuck the rice noodles in a tupperware with the tiny sack of seaweed and a plastic-wrapped miso ball (i used the corner of an old ripped produce bag). Learn more about miso balls at Just Bento, Maki's wonderful bento blog.

Ingredients
A single serving of rice noodles, whatever you deem appropriate
2 tbsp Arame seaweed
2 dried mushrooms of choice (shitake would be great, I had some Swiss thing)
1 small carrot, sliced into thin rounds
1/2 leek, sliced into thin rounds
6 little chunks of tofu (opt)

1/2 red onion, diced
3 cloves garlic, minced
1/2-inch chunk of ginger root, minced
1 dried red chili, chopped, ground, or use a pinch of hot cayenne, paprika, or chili powder
2 tsp dark miso paste
1 tbsp toasted sesame (or other, less delicious) oil

a twist of black pepper
1 tsp turmeric powder
1/2 tsp fennel seeds
4-5 cumin seeds
1/2 tsp anis seeds, if you have them (i didn't)
a dash of nutmeg
salt if desired

garnishes: chopped mint leaves, cilantro, onions, chives, chilis, or mung bean sprouts.

Directions
Put the seaweed and mushrooms in 2 cups cold water to soak

Boil 2 cups water, pour it over the rice noodles, and let them sit for a few minutes, or until soft (or follow the directions for your noodles). Drain and set into the bottom of you soup bowl.

In a saucepan, heat the oil and add the spices. Cook over medium-low heat, stirring, until nothing pops anymore (a minute or two).
Add the ginger, chili, and onion. Stir and keep cooking until the onions are glossy.
Add the leek and tofu, and if necessary, a dash of water. Keep stirring and scraping off any spices that stick to the bottom, until the leeks are tender.

Pour the water with the seaweed and mushrooms into the pan, stir thoroughly, and cover for 1-2 minutes. Keep the heat low enough that it wants to simmer but can't quite. Add the carrots and garlic, and cook for another few minutes, until the carrots are barely cooked, but nowhere near soft. Remove from the heat and stir in the miso by first dissolving it in a spoonful of hot broth. Serve!

Read more...

The Chase Daylight Vegan Challenge: Erin's going sugar-free

A good yoga teacher: One whose honesty is never curbed by fear of bluntness.

"You're getting stinky again," a little text in my google chat notified me yesterday. "Maybe it's candida."

momentary glower. Everyone loves being reminded that sweating in the 8th breath of warrior 3, they smell bad. Then a few deep breaths and...shanti, shanti, shanti, "yeah, I know." Because honestly, I do. Three months after my 10 day juice fast, I'm starting to feel a little too much like the pre-fast Erin-cranky, tired, and careless about my food choices. And, sigh, i do sweat again in yoga class, which is a sure sign that I've got some toxins to be released. Granted, as my mom pointed out, fasting is an extreme, and you can't stay at that level of purity and vitality while eating a normal diet forever, but...I have a nagging feeling of needing to reset the balance by doing mini-fasts or other cleansing things for myself every once and a while. Thre month gaps seem like good chunks for a re-evaluatin to take place. Here's my score:

All-around apreciation of eating good, healthy, and eco-friendly food: A+. I love my food, my food loves me, and no one is dying in the process (me from allergies or animals becoming steaks :))
Meal Sizes: B-. Pretty darn good, I ate enough to be full but not stuffed, and listened to when my body was hungry, especially for the first 2 months. But the past 3 weeks have been a bit rollercoastish for my tastes-example: there were 3 days of gobbling white rice dishes last week that sent me into a carb coma the size of Switzerland.
Treats: C. Ouch, slipping a little here. Yes, Erin has a sweet tooth, and rears its head most when the sun starts peeping out. "Why not a little chocolate, why not another cookie? Let's enjoy life French-style..." she says...and she's right, except that the french don't ususally clear the plate of cookies, do they ;)
Allergens: C. So many unfortunate mistakes in this category! I seem to have encountered gluten in evrey shadowy corner this year, and always when i least expect it! definitely need to be a little more reluctant to accept food from other cooks, with at least enough hesitation to get a bonified ingredient run-down first.

Today, I did Shankhaprakshalana (intestinal cleansing), a shatkarma (purification practice) from the Bihar School of Yoga's Asana Pranayama Mudra Bandha. Basically, you drink a lot of saltwater early in the morning in between rounds of yoga poses until the laxative effects kick in and, well, you get the idea. after you finish, you rest for 45 minutes and eat kichiri, my favorite indian dish of rice and lentils. Traditionally, the rice and lentils are served with lots of ghee to lubricate the naked intestines, but as a vegan, i opted for a mix of flax and sunflower oils, coldpressed and local. Then you rest for 2 days, eating nothing but kichiri, and for a month after you treat your digestive system like a newborn-non-acidic, mild, comfort foods, like, clearly, kichiri!

Today, in my required relxation hours, I looked around for a nice new vegan blog challenge and I found one just for me: The Chase Daylight Vegan Challenge, where Ryan will be trying a month of vegan food for the frst time. Everyone's invited to join and there are potentially some vegan-licious prizes involved...As I'm already a vegan, I am free to try my own version of the challenge, so I'm going sugar-free for April. I mean really sugar free, not just "granulated sugar free". That's right; no more "dashes of agave" here or "drizzles of maple syrup" there; no water-kefir made from mango syrup (sniffle); and no, no, NO glazed muffins.

But chins up, there is still a lot of room for tasty treats in the sugar-free world. I am allowing SOME fruits, just not acidic fruits. So a few apples and bananas might make it in here and there, and maybe a pear on occasion...you never know. I am also allowing some prunes at some point, because sometimes, folks, a girl's gotta do what a girl's gotta do. Otherwise, dried fruit is out for me as well.

and because Candida is a suspect here, let's make it official and chuck out yeasts, fermented foods (oh the tragedy...:( ), white rice and other refined grains and starches.

Yikes! wish me luck!

Look forward to a wealth of yummy savory and teasingly sweet recipes for the month of April. And don't forget to stay updated on the challenge by checking out the updates page here.

Read more...

Breakfast Kuzu with Quinoa-A Cure-All Treat

>> Wednesday, March 25


Ok. they're not the most beautiful photos we've ever seen,
but porridges are rarely photogenic. Have faith, it's amazing in person.


If you've ever seen an under-slept student with the flu, then you know exactly how Daniel showed up at my door one morning a few weeks ago: a little green, to say the least. He looked like an underfed stray, and he nodded at the comment (couldn't help myself), adding that in fact he hadn't been able to eat much for 3 days. I immediately flashed on an article I had read on the medicinal qualities of kuzu, a Japanese starch used for making custard-like drinks. It is foremost considered a good way to get nutritious herbs into a sick body without disturbing sensitive stomachs. Bingo!

As I'd never tried kuzu, and didn't want to miss the fun, I decided to make something palletable to healthy folk too-sort of a breakfast porridge with protein-rich quinoa, digestion-aiding spices, and lotsa love. Woweeeeee that stuff as good, and I can't believe it was healthy it tasted so sinfully sweet and yummy. You could have it as a breakfast or a light dessert, and no one would be the wiser for it.

Chai Kuzu with Quinoa
serves 2 hungry folk, or three modestly peckish chaps

3 tbsp kuzu powder
1 cup quinoa
1 cup rice milk
2 inches ginger root
5 cardamom pods
3 cloves
1/2 tsp cinnamon
1/2 tsp nutmeg
1 tbsp molasses
1 tsp agave or maple syrup
1/2 tsp vanilla extract (optional)
1 1/2 cups water

garnish of choice (optional)

Directions


Dissolve the kuzu in 1/4 cup milk and set aside.

Bring the water and quinoa to a simmer, reduce heat, cover, and let cook until the quinoa is almost done, about 15 minutes. Meanwhile, grate the ginger root and sqeeze out the juice through a tea strainer or seive, discard the solids.

Add the remaining 3/4 cup milk to the quinoa, stir, and then add the kuzu-milk, stirring well.
Add all the other ingredients except vanilla, bring to a simmer again, and continue to cook 5-10 minutes, or until well-thickened to a pudding-like consistency, stirring occasionally. If necessary, adjust the amount of milk to thin the porridge. I like mine thick :)

Serve with yogurt, kefir, chopped nuts, fruit, or a drizzle of rice milk on top. Scrumptious!

Read more...

Mustard Sprout Salad and Herb-Strewn Roasted Beets: A Light Late Lunch for Sunkissed Evenings


Some days require a little love packed in your lunch box. Yesterday, it was the way the sun incubated me through the window, slowing me down to the momentum of a boozy sunbather. I just couldn’t tolerate anything blah in that luxurious light, so I cooked a fantastic meal and served it still warm at work for an extra-special Tuesday treat.

Herb-Strewn Roasted Beets (for 1. It’s pretty easy to up the output, just add more beets!)

Ingredients
1-2 washed, whole beets, greens removed and saved for something tasty later
1 tbsp olive oil
1 tsp fresh or dried thyme
a dash of Herbamare or other herbed salt
1 tsp oregano, marjoram or thyme, or combination

Directions
Preheat the oven to 350 F (175 C)
Rub the oil onto the beets and lay them on a sheet of tinfoil. Sprinkle the thyme and a drizzle of water over them and wrap the tinfoil securely around them.
Bake for 30-40 minutes, until tender.

To serve, slice each into rings, removing the skin if you wish, and arrange overlapped on a plate. If they seem dry at all, brush or rub a drop of olive oil onto the cut surface. Dust with salt and the remaining herbs.

Very Simple Mustard Sprout Salad (for 1. Easily, easily increased, substituted, and supplemented)

Ingredients
2 tbsp mustard seed sprouts
½ small head of chicoree
1 medium carrot, grated

2 tsp wine vinegar
1 tsp sesame oil
a squeeze of lemon juice
a dash of sugar, agave, or maple syrup (optional)
a pinch of salt
a grate of pepper

Directions
Slice the chicoree into rounds and toss them with the sprouts and carrots.
Mix together the dressing ingredients and toss it all up. Fertig!

Read more...

Tahini Cookies Three Ways

>> Tuesday, March 24


There are infinite ways to finish off this recipe with your own personal touch. I fully encourage such experiments, and I offer you one of my weird variations here for a little idea of what you could do. The ground recipe is the same.

Tahini Cookie Dough
(Ground Recipe)
1/3 cup tahini
¼ cup sugar beet syrup or other syrupy sweetener
¼ cup ground hazelnuts
½ cup rice flour (plus a few tbsp)
1 tsp baking powder
1 tbsp margarine (optional)
1 tbsp water or as needed

Mix the tahini, syrup, and margarine, if using.
In a separate bowl, whisk together the dry ingredients, then add them to the wet and mix. If it is too dry to come together into a ball, add some water and try again. If it is a bit too oily (mine was, after the addition of margarine) add the extra flour.

For simple Diamond Cookies, roll the dough out on a floured board to about 1/4 inch thick and slice into diamond shapes. Then bake for about 15 minutes at 350 F (175 C), or until they are just touched with color on the edges. Careful, these over-cook quickly!

Oatmeal-Style Raisin Tahini Cookies

These involve no oats, but they sure remind me of the delicious oatmeal cookies my mom used to make...chewy, fruity, hearty, and best still warm from the oven.

To the ground recipe, add:
2 large carrots, grated
1/4 cup rice flour
1/2 cup raisins

Adjust the flour-water ratio as needed to get a thick, but workable, cookies dough.
Roll 1 tbsp of the dough into a ball, then flatten it into a cookie shape and repeat for the rest. Bake for 15-20 minutes, until lightly browned and firm enough to hold together. Let cool on a rack (barely) and enjoy :)
Also check out the directions for Dessert Sushi to see another adaptation of this ground recipe.

Read more...

Calico Kichiri and Rosemary Roasted Carrot Hash with Fresh Sprouts

>> Thursday, March 19


I looooove lentils. LOOOOOOOOVE them. All colors, shapes, sizes, and preparations. Which is probably why I can’t really manage to discriminate when it comes to creating Indian lentil dishes. Kichiri is ‘supposed’ to be made with red lentils, which is fantastic, but I wanted black lentils today, so that’s what I made. Continuing the blasphemy, I added nutritional yeast to imitate the consistency of red lentils. Recipe-sticklers beware, it was sinfully good and I don’t regret a moment of it.

The roasted carrot hash was half glorious inspiration and half poor planning-Having seen the roasted carrot dip on Just Bento, I thought it would be a perfect spread for the yummy cornbread my roommate just cooked up. After roasting the carrots, I remembered for the 100th time that we broke the food processor a few months ago. Huh. Carrots are not very mortar and pestle friendly. I used a bread knife to hack them into tiny pieces, and tried anyway, but the slippery little suckers still evaded all mushing attempts and just squirmed around my mortar mischieviously. Confounded, I tossed them into a bowl and drizzled balsamic vinegar and bragg’s over them, tossed, and tasted-WOAH that’s good!


The mustard sprouts and steamed chickpea sprouts really topped off the simple kichiri and tangy carrots. I steamed the chickpea sprouts for about 10 minutes on the lowest heat to get them tender and served them still warm over everything. So-oh-ohhhhh good. I ate two helpings and packed more for dinner, because with this good of a taste, repetition is a blessing!

Note: for the record, this meal was so satisfying I couldn’t manage to eat any more for dinner. The magic of sprouts, veggies, lentils and rice is that it’s absolutely everything you need and want, all in one delectable bowl.

Calico Kichiri


Ingredients
1 leek, sliced into rounds
1 small red onion, roughly chopped
1 cup brown rice, long or short grain
¾ cup beluga lentils
3 cups water

½ tsp cardamom powder, or 4 whole pods
1 tsp turmeric powder
3 cloves garlic, chopped (or some garlic powder-I admit it, I used powder today…)
1 tsp finely chopped ginger root
1 tbsp nutritional yeast
½ tsp cinnamon powder
2 tbsp oil

Directions
  1. Heat the oil in a saucepan over medium-low heat and add the onions and leek. Cook, stirring, until they are tender and shiny.
  2. Add the spices, garlic and ginger, continuing to stir. Scrape the bottom of the pan if it starts to stick, and just keep stirring for about a minute.
  3. Add the lentils and rice, still stirring, for 1 more minute.
  4. Add the water, cover, bring to a boil, and reduce heat. Cook for 30 minutes or until almost all the water is absorbed and everything is fully cooked.
  5. Stir in the nutritional yeast. There should be a little liquid left to create a saucy consistency with the yeast-if needed, add a drop more water, and you will get a wonderfully thick mush as it cools on the plate, stiff enough to stay on the spoon when you turn it sideways.comfort food consistency!

Rosemary Roasted Carrot Hash

Ingredients
4 carrots
1 very large sprig of rosemary
a pinch of salt
2 tsp bragg’s or tamari
2 tsp balsamic vinegar

Directions

Preheat the oven to 350 F (175 C).
Wash the carrots and chop them into large chunks. Sprinkle them with a bit of salt, set the rosemary on top, and wrap it all in a piece of foil. Bake for 30 minutes, or until tender.

After they have cooled for a moment, use a large knife to dice the carrots into very small pieces. Minced might be the word. Toss them with the vinegar and bragg's and serve over or beside your main course, warm or cool. In the summer, we’ll have to revisit this with fresh basil leaves chopped up in it…

Read more...

Spicy Chickpea Salad (makes heaps)

>> Wednesday, March 18


“How about hummus?”
“I don’t know, it’s such a pain, and we don’t have a food processor.”
“Ok, just a tahini dip.”
“Ok, good.”

Yet later that night, preparing everything for the yoga and brunch workshop, I felt that hummus was necessary. It was obviously a delirium-induced conclusion, because as I finished cooking the chickpeas early the next morning, I knew immediately that we had too much food and not enough time to make 400 grams of chickpeas into hummus with a mortar and pestle.

Hurrah for mistakes, because the resulting salad is a very welcome addition to my recipe collection. I have been enjoying (a lot of) it by itself or tossed with fresh greens. Actually, if you wanted to, you even COULD toss it all in a food processor and make hummus after all!

In fact, I am thinking that later this week some falafel might grown where the salad was planted...I'll keep ya posted.

Spicy Chickpea Salad

Ingredients

4 cups cooked chickpeas
1 large green bell pepper
4 carrots
1 cup mung bean sprouts
½ cup chopped parsley (plus 2 tbsp garnish)

Juice of 1 lemon
2 cloves garlic
½ inch ginger root
2 tbsp miso paste
salt and pepper to taste
2 tbsp bragg’s/tamari
½ cup oil
½ cup white wine vinegar
¼ cup water kefir or some water + another vinegar of choice + a dash of sugar
1 tsp hot paprika
1 tbsp zatar (plus 2 tbsp garnish)

Directions

Chop the bell pepper and carrots into small chunks.
Into a large jar, grate the ginger and garlic. Add the other dressing ingredients, mix, and pour over the salad. Let it sit for an hour or two in the fridge before serving, then garnish with the zatar and parsley.

Read more...

NorCal Dolmas (and no-waste rice milk!)

>> Tuesday, March 17

Fresh, sticky dolma filling

Of all the teachers I’ve had in my life, a few of them stand out like gold embossing in my memory. One of these radiant individuals is Jon, the counselor from my high school. He and his wife, my art teacher, are two of the spunkiest folks I’ve ever met, and the things I’ve learned from them go a long way past the classroom. Like, for example, into the kitchen. Before moving into teaching, they ran a little restaurant in California and the cooking bug as never left them as far as I can tell.

Last summer, as Sheri scrambled to finish a huge multimedia piece for her art show (that night-artistic procrastination at its best), Jon entered the kitchen with an armload of groceries and a determined jut to his jaw. “We’ve gotta make a lot of food,” he informed Daniel and I, and, wow, did we ever.

I recalled all this last week as I prepared for the Yoga and brunch workshop at B.Yoga Basel. with a bunch of yogis to feed, Jon’s dolmas sprang to mind immediately as an easy, tasty, and for some reason ‘impressive’ dish that I could bring. Everyone likes dolmas. Not just for soulful combo of tangy lemon and spiced rice, but there’s something about the presentation of it all in a slick green grape leaf that makes you think, “I am dining exactly as Caesar would have dined, and for that, I am magnificent.”
Enjoy the illusion of grandeur; just don’t tell them how easy it was to make them. I didn’t manage to get a picture, but I think that’s a fairly good selling point, don’t you?


NorCal Dolmas (makes about 60)
This recipe is modified to simultaneously cook the rice and make rice milk which is not necessary, but COOL. See the notes section for more information on alternative methods and the who-what-why's...

Ingredients
1 jar grape leaves (preferably without the “acidity regulators” and “E-whatevers”)
5 cups short grain brown rice, soaked overnight in twice as much water
3 lemons
400 grams raisins, finely chopped
lotsa cinnamon
a pinch of salt
a grate or two of nutmeg (if you’re feelin’ lucky)
¼ cup olive oil (hugely flexible amount)

Directions
  1. Without straining or rinsing, add 2 cups of water to the rice and cook, covered, until tender.
  2. Strain the rice and set aside the liquid (add a tiny pinch of salt and some sugar and you have rice milk! Now that was easy!)
  3. To the rice, add the raisins, cinnamon, salt, and nutmeg. Stir it all up and be ruthless so the consistency gets good and gooey. You want it to be self-adhesive so it doesn’t crumble when you bite into the dolma.
  4. Add the grated zest and juice of 1 lemon at a time, tasting after each one to make sure it’s not too sour. Adjust the spices to taste. If needed, add a little bit of the rice milk to get the stickiness level up.
  5. Drain the leaves and unfold them on a clean plate. Taste a broken one (there’s always at least one) to make sure it’s not too salty or acidic, and rinse them quickly if it is. If they aren’t flavorful enough, add a dash of apple cider vinegar to the rice mixture.
  6. Pour a tablespoon of oil onto another plate, set a leaf in the oil with the vein-ey side up and the stem facing you, and push the leaf around to coat the plate in oil. Depending on the size of the leaf, fill it with about 2 TBSP filling, fold up the bottom, tuck in the sides, and roll it to the top. Voila!
  7. Repeat until the oil is gone and add another tablespoon of oil. A nice touch is to add some sliced lemon-rounds.
Notes
The directions here say to soak the rice. This increases digestibility whether you choose to do the rice milk thing or not, and I recommend soaking all grains overnight before cooking for this reason. Here, the soaking also induces some milky qualities in the water that let us make rice milk later by adding some extra water. Thus, you have 3 choices here:
You can
1) Follow the above directions for rice milk and rice
2) Soak the rice but skip the additional water and straining process, giving you really stomach-friendly rice, which might be nice with all the dried fruit going on here, OR
3) Cook the rice like most people cook rice-stick it in a pot with some water and just cook it, no soaking, no extra water weirdness, no random milk biproduct. Your choice!

Read more...

Sundried Tomato and Black Olive Dip

>> Sunday, March 15


So easy, so good. We had this at a Yoga and Brunch workshop this weekend and I managed to snap a quick picture just before the bowl was scraped clean. It's fantastic on chips, salads, bread, or even over pasta or rice as a creamy vegan sauce.

Ingredients

  • 1/2 cup finely chopped sun dried tomato halves (not in oil)
  • juice of 1 lemon
  • 1/4 cup finely chopped black/greek olives
  • salt to taste (careful, the tomatoes are salty!)
  • 1/2 tsp ground black pepper
  • 1 tsp hot paprika
  • 1 clove garlic, pressed or grated
  • 2 cups soy yogurt/kefir
  • 3 tbsp chopped parlsey

Directions
  1. Mix the lemon juice and sun dried tomatoes in a bowl, stir, and let them sit for a moment until the tomatoes are softened.
  2. Add the rest of the ingredients, mix, cover, and chill until you're ready to serve.
Notes

For a thicker variation, which could be used as a thick spread, strain the yogurt before adding it by hanging it in a cheesecloth overnight. Check out this recipe for help with instructions.

Read more...

The Son of Franken-Crepe: Erin's Kitchen Disaster

>> Saturday, February 28


Can you find 5 things that are different between these pictures?
Hint: the direction of the wood grain and the spatula are not the answers we were looking for


I realized yesterday, reading over squeaky mouse’s blog for dessert ideas, that I should confess something. I often…OFTEN…mess things up in the kitchen. It’s part of the process, and none of the recipes here would exist without the 3 mutilated versions immediately prior. The convenience of blogging is, I can post whichever picture I want. But just for a change of pace, let’s see the other side of Erin’s kitchen today.

I’m in pancake mania, and being home sick isn’t helping anything. Someone, tell me, what do you do when you’ve got 500 recipes to try, most of them involve fermented doughs, you’re bored out of your mind (even though you have many better things to do), and it’s breakfast time? Shhh…you’re not actually supposed to give an answer. I like mine. You make fermented buckwheat crepes.

I made the batter yesterday as an experiment because we’re planning some sourdough pancakes this weekend (the binge has no end in sight). It’s been sitting in the living room doing its yeast-gathering thing, and is definitely not a bubbly sourdough starter today, but it’s got a nice eggy texture that was wholly unexpected. I’ve got some leftover Country Corn and Potato Stew (recipe forthcoming), also unexpected, so we’re kickin’ it Erin style and slapping two completely unrelated food items together for a single-serving breakfast, just because we can.


Basic Recipe
Makes 1 mini crepe and 1 shriveled bat-ear look-alike. A useful quantity for 1 not very hungry child

Put1 tbsp canola oil, a dash of salt, and a grind of pepper into a jar.
Add in about 1/3 cup of your fermenting starter (chickpea and buckwheat flour with water, left to sit overnight), which you weren’t supposed to use for another 2 days.
Add a splash of water to get the consistency right, and if you have water kefir or kefir whey handy, use that instead to get some tang in there.

Heat the pan (mine is nonstick, and I didn’t oil it) for about 1 millisecond and toss 1 spoonful (clearly not enough) batter into the pan. Pause thoughtfully as you realize your mistake, then drizzle more batter around the original plop, and turn the pan to coat the bottom, which won’t work because the center is already firmed and the outside is still to runny. Don’t worry, it’s all part of the plan.

Because it seems better to get this painful thing out of the way as quickly as possible, flip the bat-ear before it’s even lightly browned. It should gum up on the spatula, stick to the bottom, and break in multiple places. Then you can attempt to cleverly fold it in half, because…Jesus, I have NO idea why. It seemed logical at the time, but I can’t justify that at ALL. This will make things worse, because it has now dried out too much to fold, and in a fit of panic, you can heave the thing onto the table “tsk” ing. Whisper: “Curse you, you crepe-bastard…”

Don’t worry, we’re almost done. Then you can turn the heat up to just over medium, mix a little more water into the batter, and dump it all into the pan. Amazingly, miraculously, like wine from water, the puddle of monster goo blooms into a lightly sizzling crepe, which, a few seconds after pouring, is ready to be gracefully flipped onto it’s white belly and cooked to golden perfection.

Serve with warmed leftover stew and a few finely chopped leek greens on top. Mop up the liquid left on your plate with the leathery mutant crepe, because one small crepe is not very much food and it's already too late to make something else. Bonus: you've eliminated the evidence of just how badly you can cook.

(Although, this version was actually really good.)

Check back tomorrow for the perfected recipe of sourdough buckwheat crepes!

Read more...

Recycled Bread 2: Kvass-Potato Paprikash

>> Wednesday, February 25


i
I guess Russia just invaded Hungary. Either that, or I am feeling sentimental about all the potato paprikash I ate there, and I want to recreate the experience with the things I have available. Primarily: leftovers from making kvass, a Russian drink made from stale bread soaked in water, sugar, yeast, mint, and lemon. The leftovers are a ball of mushy bread goo, and I couldn’t think of anything better to do with bread than make, um, bread. Next time you try out kvass-making, you know what to do next. Of course, you can make this bread without the kvass mush too. Substitutes are listed in the notes.

Kvass-Potato Paprikash Bread

As with my other recycled bread, this is a fairly dense loaf. It can stand alone as a hearty breakfast slice, but still makes a great sandwich, or a delicious appetizer sliced, roasted, and served with vegan mint raita.

Ingredients:
2 cups leftover mush from making kvass*
1 cup cornmeal SD starter
½ cup water kefir
2 tbsp molasses
2 tbsp kimchee brine (or water with salt and garlic)
2 potatoes, 1 grated, 1 chopped in thin slices
1/3 cup chopped leek
¾ cup polenta OR ¼ cup polenta and ½ cup recycled grain (leftover rice or something)
2 tbsp nutritional yeast
3 tbsp sweet or medium paprika powder plus some for garnish
¼ cup canola oil
2 tsp baking powder

Directions:

  1. Mix the sourdough starter with the molasses, polenta/polenta+grain, and water kefir. Leave covered in a warm place for 12-24 hours.
  2. Preheat the oven to 375 F(190 C)
  3. Mix in everything but the oil and combine very well.
  4. Heat the oil until bubbly and mix it quickly into the dough.
  5. Scrape the dough into an oiled, floured casserole dish (makes a cornbread shaped loaf) and garnish with paprika.
  6. Put in the oven and reduce heat to 350 F (175 C)
  7. Bake for 30 minutes or until the loaf begins to come away from the sides. Cool before slicing

Notes:
*Subsititute: a leftover cooked grain, blended up into a thick mush (don't add liquid) would work fine, as would mashed potatoes and some flour. Or add another grated potato and enough flour to get a good consistency. Or, combine the above ideas.

Read more...

Savory Granola Success: Dankness and Beyond

>> Tuesday, February 24


Dank. It doesn’t mean dark and wet here. In Northern California lingo, it’s the epitome of GOOD. No, I don’t think you heard that right; Goo-OO-ooOOd. The stuttering, multi-syllabic one. There you go. That one.

As I wrote yesterday, I accidentally ate some gluten over the weekend and I have been functioning in a stupor of all the usuals ever since: indigestion, bloating, headache, and cravings. This granola is my answer to feeling nutrient- and fiber-deprived: pumpkin seeds and molasses for iron and calcium, plus more from the tahini; fiber from flax, oats, and “chufas nĂĽssli,” and healthy fats from the flax oil and other seeds and nuts. Nutritional yeast for trace elements that GF-eaters can always use, and a dose of good intentions for healing up my digestive tract. And the olives are healthy, but I did it for the flavuh, because let me tell you...Mm. Mm-hm.

I put everything I had into this granola recipe, and I am pleased to say that somehow, it came out delicious. Of course, you can add the ingredients closest to your heart instead of the ones I chose-I just had a hankering for the taste of seedy-nutty-sesame-braggs-yeasty-goodness, a combination that tastes so much like home I might have woken my mom up from around the world just by listing them in that order. Dank. It’s really all I can say.

Spiced Savory Granola, GF and Vegan, of course!

Ingredients (don’t be intimidated, mix and match as needed, and see notes for help!):
½ cup activated sunflower seeds
1/3 cup activated pumpkin seeds
1/3 cup sesame seeds
½ cup flax seeds
¼ cup activated hazelnuts
½ cup GF oats
½ cup nutritional yeast
½ cup chestnut flakes
½ cup ground "earth almonds"*
1 tbsp rosemary
1 tsp ground cardamom
¼ tsp nutmeg
½ tsp garlic powder
½ tsp cumin
1 tsp fennel seeds
½ tsp black pepper

1 small banana
1 tbsp braggs amino acids or tamari
1 tbsp tahini
1 tbsp molasses
10 kalamata olives
1 tbsp flax oil

You think I’m crazy, don’t you? Bananas and olives? yeast and molasses? What are Earth Almonds anyway??? Just come to the dark side of baking, that shadowy experiment lab, for an afternoon and try to tell me after it wasn’t worth it.

Directions:

  1. Grind the flax and fennel seeds into a coarse meal.
  2. In a mortar and pestle, or food processor, mix to a paste ½ the sunflower seeds, a few spoons of water, the hazelnuts, flax-fennel meal, and all the wet ingredients.
  3. As your seeds/nuts will probably still be wet from soaking, toss them in the wet ingredients and stir together.
  4. In a large bowl, mix the dry ingredients with a fork until combined.
  5. Pour the wet ingredients over the dry and mix together. It should all be moistened and vaguely sticky. If you have dry spots left, add a splash of water and/or oil and mix again.
  6. Preheat the oven to 350 F (175 C). Oil a large baking sheet and spread the mixture out on the sheet, loosely breaking into clumps with a spoon or fork.
  7. Bake for 30 minutes, or until browned and mostly dry, stirring every 15 minutes to prevent burning.
  8. Let cool and enjoy!

Notes:
*sedge tubers. If the word 'tuber' confuses you, see here. Often the spanish word chufas is used on packaging. You can substitute nut meal of any kind or another mealy ingredient, or up the oats and omit them entirely.

A few tips to keep in mind for substitutions:
Savory granola is lacking the usual gooey component of honey, agave, or (blech) corn syrup that most sweet granola’s use. That’s why I used a banana, the tahini, the ground sunflower seeds, and the molasses, all of which moisten and bind. The banana doesn’t give any flavor to the finished granola, but you could substitute something else if you just don’t like the sound of it-applesauce or nut butters work well, but with nut butters, you will need to add something liquid to even out the thickness. Using flax meal also adds to stickiness, and is just fantastically healthy and good.
The point is, granola is simple, and you don’t have to follow any recipe to the t. Just add the things you like and see what happens, I truly don’t think you can go wrong.

(Ready for shelving in a recycled raw sugar bag :))

Read more...

Basic Soy Kefir

>> Sunday, February 22

Basic Soy Kefir

I read on Dom’s website (<-- at this site, scroll to bottom and click the link for seed/nut milk kefir, my link to it is not working at the moment) that kefir grains will not live long and happy lives in soy-only diets. I have no idea. I generally like water kefir more often than I like soymilk kefir, so I alternate my grains between the two. I don’t know if that’s a good idea or not, but I do it. And it seems to work.

Many of the same principles apply to kefir making as to yogurt making. You can look at Basic Soy Yogurt for information on choosing milk, cleanliness, etc. There are also some kefir-specific things you should know.

As kefir ferments, it creates carbonation in the milk, and causes pressure in sealed containers. If you seal the container (and I do, because I like those bubbles ☺), you should fill it only ¾ full to avoid explosions, no matter how cool creating your own explosives might seem.

If you keep making milk kefir, it’s a good idea to rinse the grains in room temperature, filtered water (unchlorinated). Otherwise, they can get a gooey layer on their surface which makes it hard for them to function.

I just feel silly writing more because Dom’s Kefir Making Site has all the information you could ever need and if you want to know more, check it out. Here is my extremely low-key kefir-making process:

Basic Soy Kefir

Ingredients:
1 liter soymilk, at room temperature
1 tbsp kefir grains

Materials:
glass container (at least 1.5 liter sealed, at least 1 liter open)
plastic mesh strainer, cheesecloth, or something else to strain the grains out (loose weave)

Directions:

  1. Clean all the materials before you start with soap and then again with hot water. Finally, rinse with cool water to avoid damaging the kefir grains.
  2. Add the milk to the container and gently add the grains.
  3. Cover if desired and leave in a warm place for 12-24 hours, occasionally swishing around the contents to break up curds. You can also open the lid if it is sealed to release pressure.
  4. When it’s the thickness you like, you can either strain the kefir through a clean cloth or you can just spoon them out, rinse them with unchlorinated water, and plunk them in some new milk or water kefir mix.
  5. Let the kefir age at room temperature for a more sour taste, or refrigerated to keep it mild.

Notes:
If you let the kefir age with the grains inside for an extra 12 hours or so, you will get a very thick kefir which can be strained and made into a thick, quark-like cream. It’s a great ingredient for Vegan Mint Raita or any other recipes that need sour cream or similar dairy products. Check out the easy instructions here.

Read more...

Basic Soy Yogurt

>> Saturday, February 21

Yogurt making is so simple I didn’t really believe I had managed it the first time. All you are doing is creating a good environment for your bacteria (clean, warm, and with something they can eat) and letting them do the rest. So the only things you need to worry about are cleanliness (wash all your materials and don’t lick the spoon) and temperature.

MILK: Soy yogurt is only slightly more tricky, and mainly because quality and ingredients in commercial soymilk can vary. In general, I think it is better to buy organic soymilk with no additives or sweeteners, and to check to see if it was made from whole soybeans or from soy flour. Don’t buy milk that was made from flour, that’s just not how you make grain milks and it creeps me out! If you use a sweetened milk, the safest sweeteners are sugar or cane juice. Others can interfere with the bacterial growth, although I would like to see if molasses works, and I’ll post as soon as I know. You can always add a sweetener later!

TEMPERATURE: It took me some experimenting to find that the temperature is also a more sensitive issue with soy, and if your milk is too hot, it will curdle immediately. In this respect, it is always better to err on the side of cool if you don’t know how warm to make the milk-if it’s too cold to help the bacteria grow a lot, you can usually just wait longer and it will eventually reach the right thickness.

The third thing is that incubation times can vary a LOT and I’m really not sure why. I am guessing it is mostly the temperature it stays at while thickening, and if it stays a nice constant temperature, it works much faster. You are working with little bacteria that in some ways act like people-they slow down if it’s cold or really hot. Lately I have let mine sit for a minimum of 9 hours. Then I check the thickness by jiggling the jar a little, or tilting it lightly, and if I want it thicker, I leave it. If you leave it for too long, like 24 hours or so, you get a lot of separation, but it is still totally edible.

CLEANLINESS: Wash all your materials beforehand with soap and again with just hot water. Never touch things with your hands before the milk or yogurt touches them, and don’t dip your fingers in the yogurt or milk. It’s a good idea to cover the yogurt with something when it is incubating to keep other organisms out.

I have never used a powdered or liquid culture started for my yogurt, I just look for a good live yogurt in the shop and use the last of it. It will work either way though, and you can do what works for you

So, my tips for making good soy yogurt:
Be clean
Use plain, good quality, organic “whole-bean” soymilk
Don’t overheat the milk
Don’t move the jar during incubation
Keep the yogurt as warm as you can while it sits

All that being said, I should add that I have made yogurt in all kinds of places at all kinds of temperatures, and the worst that can happen is you have a jar of milk at the end, which is exactly what you started with. Don’t worry, it’s forgiving ☺

Basic Soy Yogurt
Makes 1 liter

Ingredients:
Slightly less than one liter of soy milk (1 liter minus about 4 tbsp)
4 tbsp plain, live, cultured soy yogurt

Materials:
1 liter glass jar
medium saucepan
a thick kitchen towel, a big cooking pot (or yogurt incubator), an insulated lunchbox, or something else to put the yogurt in to keep it warm.
a long spoon or other stirrer

Directions:
Before beginning, thoroughly wash all tools and containers and rinse in super-hot water.
Put the yogurt in the jar

Over a low flame, heat the milk, stirring. Test the temperature by letting a drop fall from the spoon onto your wrist (and don’t let it fall from your wrist into the pan, you want things clean!). The milk should feel very warm, but not at all uncomfortable; it doesn’t take long, so watch it!

When the milk is ready, put a few spoonfuls of milk into the yogurt and combine. (If it curdles, your milk was too hot and you can continue knowing you will have very lumpy yogurt, or start over with fresh yogurt)

Add the rest of the milk and slowly stir together, combining thoroughly. Set the jar in a warm place where it won’t be moved; a covered pot of water the same temperature as the milk, or inside an insulated lunchbox with a jar of warm water next to it to keep the temperature up. If you have a warm enough spot (like next to where you are cooking, if you will cook a lot that day) you can wrap the yogurt in a towel and leave it there.

Let the yogurt incubate for at least 8 hours, check the thickness and let sit for a few more hours if it’s too thin. When it’s finished, put the yogurt in the fridge to slow bacterial growth.

Read more...

African Black-Eyed Banana Muffins

>> Thursday, February 19

(For lunch with stir-fried chard and carrots and sunflower-pumpkin seed mash)

(Heaven: noun: a place existing in the overlap of molasses and hot muffins)

(Silicone muffin cups, oh how i love thee.
Thine sides are oh so pliable, portable, and never ever stick)

No, I wasn’t beating up on the fruit. I just had a weird burst of inspiration to make something that I’ve never even imagined before. It took a day of serious thought, beginning with never-before-tried item number 1: black-eyed peas. They’ve been sitting in the cupboard for a while now, and I’ve still never even tasted one, not in my whole life.

“Never?” My mom’s voice is audibly incredulous.
“Nope.”
“We ate ‘em every new years when I was growing up, it’s a southern thing I guess…”
Well, that’s what happens when southerners move northwest. Rice milk and nutritional yeast take up more and more of their pantry-space. My mom held strong on a lot of southern items, like cast-iron skillets and some epic chilis, but somehow we missed the black-eyed peas.
“Blech, they’re boring.” She adds. Sabotage! With a fresh-soaked bowl of black-eyed peas peering quietly up from the table, it sounds like sacrilege to me, and I’m ready to make something decidedly not-boring.

Black eyed peas came to the southern US as a result of slave trade. They originate in Africa, and have been cultivated there for thousands of years, often as a partner crop to millet, because of the nitrogen-fixing qualities of legumes. Light-bulb: Millet. Yum. I just so happen to have recently tried a great recipe form Wild Fermentation for African Millet Porridge. It’s extremely simple. You literally just have to soak some coarsely-ground millet in water overnight to get a week of breakfasts. A theme emerges, yet somehow, beans and millet sounds like just another northern Californian hippie Thanksgiving. There’s gotta be a way to make that more African.

With a little research, I learned a lot about African food. Let me tell you, the things I didn’t know could be the topic of a few massive volumes. The dishes I dug up feature so many great flavor combinations my western palette trembles at the mere mention of: onions and coconut, peppers and banana, beans and sugar, oh yes, talk about bringing down the cultural house! My roommate just bought a bunch of bananas, and we’ve got loads of coconut, creamed and shredded. BAM! We’ve got everything we need for some Congo-cookin’!

Except, sigh, an actual meal idea. Porridge is delicious, but I need something more portable right now. With a full schedule of being extra-house this week, I know I won’t be returning to top off a soup bowl in between yoga and work. It was a tense moment, and I was sure I would have to abandon African Cuisine for the day, until…When you need them, answers come, my friend, and it was something like euphoria when my gaze fell upon my lovely new muffin tray. Fast as you can say “Mom, black-eyed peas are not boring, they are underappreciated and any fan of hand crafts ought to understand that fully!” I was wrapping some paper around a muffin for the road-and my mouth around the second. They’re that good.

African Black-Eyed Banana Muffins

Ingredients (12 muffins; start the day before baking for the long method):

2 1/2 cups millet, coarsely ground (I used a mortar and pestle)

1 1/2 cup cooked black-eyed peas*
2 ripe bananas
¼ cup rice milk or coconut milk
3 tbsp canola oil
2 tsp molasses
2 tbsp creamed coconut
4 tbsp grated coconut (plus 2 tbsp opt. garnish)

pinch of salt
½ tsp cinnamon
½ tsp nutmeg
½ tsp cardamom
3 cloves, ground to powder
¼ tsp cayenne pepper
1/4 tsp black pepper
1/2 cup buckwheat flour**
1 tbsp baking powder

1 dried banana, in 12 short slices-(opt, garnish)

Directions:
  1. Stir the millet in a large, non-metallic bowl with about 3 cups of water. Let it sit overnight (This aids digestibility and enhances flavor, but you can also cook the millet before using without any soaking)
  2. Cook the soaked millet mixture, stirring occasionally until the water is absorbed but it is still moist (about 10 minutes)
  3. Preheat the oven to 350 F (175 C)
  4. Mash together the millet, beans, and bananas.
  5. Add the wet ingredients, except milk, and combine well.
  6. Add the dry ingredients and check the consistency. It should slowly drop off a spoon, but be thick. Add just enough milk to get the consistency you want, and spoon into your muffin tray
  7. Garnish each with a sprinkle of coconut and a slice of banana.
  8. Bake for about 30 minutes, until browned on top and coming away from the sides. They will still be fairly moist. remove them from the tray after a few minutes of cooling, and let them finish cooling on a rack to prevent soggy bottoms. Enjoy with molasses, curry, or with a savory dish of steamed dark greens. They go sweet, sour, or salty as you please!

Notes:
*If you are cooking dry black-eyed peas, soak them in a separate bowl at the same time you start the millet soaking. Then, cook them for an hour or until tender before you begin the recipe.
**You could definitely up the millet and grind it a little better and not include any buckwheat if you want.

If you share my excitement for new and intriguing foreign flavors, check out this great African food site, Africa Cookbook from UPenn, especially this recipe for Akara, which helped give me the idea for my muffins

By the way, did I mention these are an AMAZING nutrient source? THEY ARE.

Read more...

The Versatile Vegan "Cream"


(kefir cream strained for 20 minutes or so)

This is the easiest and healthiest way I know to make a good cream substitute for recipes where I want something rich. It is essentially quark, a thickened yogurt I discovered in Switzerland for the first time. The process is incredibly simple, and just takes a little bit of time. If you have a lot of kefir grains, it's a good idea to just make your extra kefir into an extra stockpile of this cream.

For savory things, I tend to prefer using kefir as a base, as it is usually more sour than yogurt. It can even be used plain as a sour cream on potatoes. For sweet sauces or dips, the yogurt is perfect. In baking and cooking, it really doesn't seem to matter. Remember that if you would like to maintain the live bacteria, add the cream after cooking so it doesn't get too hot. Of course, it's not always possible to do that, and the taste and texture will stay great no matter what.

The Versatile Vegan "Cream"

Ingredients:
  • 4 cups soy yogurt or thick soy kefir
  • cheesecloth (or a thin, clean towel)
  • string, and a place to hang it over a
  • bowl to catch the "whey"

Directions:
  1. Make sure everything's very clean before beginning.
  2. Lay the cloth inside the bowl, draped over the edges
  3. Pour all of your yogurt or kefir into the bowl, making sure it all stays inside the cloth.
  4. Gather and life the edges, then tie a strong knot around them so you have a sack.
  5. Loop the string around a hook and let it hang above the bowl.
  6. As the whey drains out, your cream is thickening*. Just remove when you think it's ready and store in a clean container in the fridge!

Notes:
*For most recipes, a few hours is plenty to get it very thick. Sometimes I even leave it for less than one hour. It's totally up to you. For more ideas about kefir "cream" you can visit Dom's Kefir-Making Site, which has a lot of creative recipes for cheese-making and other cool things.

My favorite use for Kefir-cream right now is Vegan Mint Raita.

Read more...

Guiltless Quiche Provencal

>> Wednesday, February 18


As a teasing, warm morning unfolded Saturday, I caught a whiff of fresh oregano in Marktplatz, where the morning market is always held in Basel. I sourced it to a booth with marinated green olives, some stuffed with garlic, others almonds, and all begging to be sampled. The tangy, herbed meat of a large, plump olive reminded me just how long it had been since I had enjoyed one. Winter has apparently converted all my taste buds to conservative root vegetable fundamentalists. Like most people in northern climates who try to eat local in the winter, I’ve mostly eaten potatoes, carrots, and beets for the past few months. Enough is enough. We like our root veggies, but there’s a need at some point to help spring get back up here. But what to do to try to bring some life to a decidedly northern meal plan?

When in doubt, just think Mediterranean. It’s a region that never ceases to dazzle and satisfy our tastes. So many articles have been published on the health benefits of Mediterranean cuisine, and the area’s food culture is rich in delicious, varied local ingredients, artistic creativity, and an appreciation for true enjoyment; the kind that comes from long summer days drinking coffee in the shade of olive trees, absorbing lazily that warm southern repose. Italy, France, Greece…Sure, there’re the ancient civilizations, the scientific breakthroughs, philosophical landmarks, and artistic geniuses; and then there is the tender, delicate pesto, the elegant tapas, and, the mother of all soul-satisfying goodness, the quiche.

Then you discovered a gluten allergy, and turned vegan. And one chirping spring morning found you gazing teary-eyed at the warm glow of the deli case before turning back to the salad bar, sure you would never enjoy another bite of your favorite café courtyard meal.

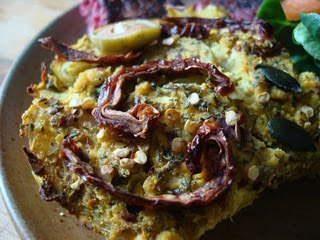
A few hours after the olive-sampling in the market I am contentedly kicked back with a tea and a warm belly full of the most flavorful, perfectly-textured quiche I’ve ever had. And you know what? Not one animal ingredient or glutinous grain. Just the summer-fresh taste of sundried tomatoes, fresh basil, oregano, and rosemary, and the springy, dense moisture of this crustless quiche’s golden flesh. It’s enough to transport any gluten-free, vegan, landlocked northern cook to vibrant French Provence. Forget about breaking a sweat in every bakery- The divinity that is fresh quiche is all yours.

Guiltless Quiche Provencal
(Thanks to The Happy Herbivore for the inspiration to use turmeric-colored tofu and other great ideas!)

Ingredients:

  • 400 g firm tofu, drained
  • ½-1 tsp turmeric (for color)
  • ½ tsp black pepper
  • ½ tsp salt
  • 1 tsp Braggs (opt.)
  • ¼ cup nutritional yeast
  • 1 tsp oregano
  • 1 heaping tbsp fresh chopped rosemary
  • 2 tbsp fresh chopped basil
  • juice of 1 lemon
  • 4-5 cloves garlic
  • 100 g green olives, sliced (reserve 5 slices for garnish)
  • 10 sundried tomatoes (reserve 4 for garnish)
  • ½ head celeriac, grated
  • ½ kohlrabi, grated
  • ½ leek, chopped
  • 1 bunch/head of chard, chopped
  • 2 tbsp pumpkin seeds (garnish)
Directions:
  1. Preheat oven to 350 F (175 C). Set aside 5 slices of olive, 4 tomatoes, and the pumpkin seeds for garnish.
  2. In a large frying pan steam 6 tomatoes, chopped, in a little bit of water until softened and warm. Add the vegetables, cover, and steam until the chard is wilted. Set aside.
  3. Combine all the other ingredients and puree in a food processor or mix by hand until you have a smooth, thick batter. Add a tiny bit of water if needed to blend everything fairly smooth.
  4. Combine everything and scrape into an oiled casserole dish.
  5. Garnish and bake for 20-30 minutes, until the center is firm and the sides are lightly browned and coming away from the sides.
  6. Let cool until sliceable and serve.

Notes:
As a party dish, this can easily become dip for bread, chips, or crackers. Follow directions for steps 1-4, then garnish and bake just until warmed through.

Read more...

Sweet Apple-Banana Muffins

>> Monday, February 16

(Fresh from the Oven)

(Our muffin brunch on the train to Biel)

Since completing a fast in January to kick off the new year, it's been hard for me to find sweet things that don't completely knock me into a coma for the rest of the day. Sugar is just so STRONG! When I saw the theme for this month's Go Ahead Honey-It's Gluten-Free, I didn't know what to do..."Sweets for Your Sweetheart," huh? Oh great, how can I pull off a sweet fit for Valentine's Day when I'm barely managing to finish an apple on my own lately?

Come Valentine's Day morning I still had no idea. Finally, in the late morning, leaving the yoga studio, a little light-bulb went on somewhere above my head: "Hey Daniel, let's make muffins!" Not too sweet, not too heavy, and yet, when a truly good vegan, gluten-free muffin comes along, nothing to be scoffed at. We were both so excited to try our hand at an allergen-free muffin recipe that the whole day became a workshop in the kitchen, grains and flours flying everywhere, and sticky guar-gum fingerprints attached to every surface, including the keyboard, after we looked up this recipe for inspiration, from Karina at the Gluten Free Goddess.

The hard-won result was a beautiful tray of pink-tinged muffins, boasting apples, bananas, dates, and the sweet toasted flavor of roasted red rice flour. We whipped them out of the oven and ran to the evening satsang class before even getting a chance to test them. And in fact, it wasn't until the next day, on the train to Biel, that we unpacked our late Valentine's picknick and took the first bite. I was terrified, having had many a grainy, chewy GF muffin in the fast few years. It was like a dream. They were delicious. The mix of fruity flavors, the light sweetness, and the delectable moist texture melted in my mouth and left me pleasantly unburdened from the usual sugar-crash. A perfect Valentine's Day sweet, but don't think for a moment you won't want them every day.

Sweet Apple-Banana Muffins

Ingredients:
1/3 cup rice milk (and/or yogurt)
3/4 cup banana puree
1/3 cup apple sauce
2 tbsp agave nectar
1/3 cup vegan butter (and/or oil)
2 tbsp flax meal soaked in 2 tbsp hot water for 5 minutes

150 g dates, pitted and chopped
1 medium apple, chopped

1/2 tsp cinnamon
1/4 tsp nutmeg
1/2 tsp guar gum
1 tbsp baking powder
pinch of salt
2 tsp kuzu powder*
1/2 cup millet flour
1/2 cup amaranth flour
1/2 cup buckwheat flour
1/4 cup chickpea flour
1/4 cup red rice flour

Directions:

Preheat the oven to 350 F (175 C)

Cream together the wet ingredients in a large mixing bowl.

In a separate bowl, whisk the dry ingredients together. Add to the wet ingredients and mix until just combined. Stir in the apples and dates. The batter should be thick but thoroughly moist, like a drop biscuit batter almost. It should slide off the spoon, but with a little encouragement. add some rice milk if needed.

Scrape the batter into a greased, 12-muffin tray and bake for 20-30 minutes, until lightly browned on top.

Notes:
*If you don't have kuzu, use tapioca instead of chickpea flour in the recipe, and you should have enough of a starchy element from that

On the flours: We used so many types of flour because we had little bits of each left over! you could easily simplify and use just buckwheat, millet, and rice, or some other combination. Still, if you do have the supplies available to follow this mix, the taste and texture are pretty rewarding!

Read more...

Vegan Mint Raita

(Raita over crispy slices of oven-toasted Kvass-Potato Paprikash Bread)

Raita is an Indian dip served with spicy food as a cooling agent. As this one involves its own chilis, it is also a little spicy, but it still maintains the cool sensation of the yogurt/kefir. Since making it to go with an Indian meal cooked by a friend the other day, I have been addicted to its spicy-cold duality. I now have a jar permanently out at meals to add to salad, today’s risotto, or to dip veggies and bread in.

Vegan Mint Raita

Ingredients:
  • 2 cups soy kefir, strained, or soy yogurt
  • 1 cucumber, peeled
  • 1 green chili
  • ½ bunch cilantro
  • ½ bunch mint
  • 1 clove garlic
  • Grated zest of 1 lemon
  • Ground, roasted cumin seeds*, to taste
  • ½ tsp salt
  • ½ tsp grated ginger

Directions:
  1. Grate the cucumber and add it to the yogurt or kefir
  2. Finely chop and add the chili, cilantro, and mint.
  3. Grate in the garlic clove and add the lemon zest, cumin, salt, and ginger.
  4. Taste and adjust, then cover and let sit in the fridge for at least an hour before serving. It's even better the next day ☺

Notes:
* Roast about 1 tbsp cumin seeds in a dry skillet over medium-low heat until lightly browned. Grind into a powder and add as much as you like the taste of. It’s strong, so test it as you go.

Read more...

  © Blogger templates Shiny by Ourblogtemplates.com 2008

Back to TOP