Showing posts with label gluten free. Show all posts

Saturday Night: Chunky Pumpkin Soup for Pre-Partiers

>> Saturday, January 30

It's Saturday.  It's Saturday.  Are you getting this loud and clear?  SATURDAY.
The long-awaited herald of the real, live weekend.  We all know Friday is for sissies.  Saturday is when the Rockstars rule the world, the glow of unforeseen adventure in their glittering, glassy eyes;  the cold winds of a Swiss January deter only the faintest of heart, and those of us who know what it means to boogie take to the streets in pursuit of swaying bliss.

But not without some soup first.

Tonight is not just any Saturday either, but specifically the Saturday of the Couchsurfing monthly meeting in Basel, and a huge party in nearby Freiburg, Germany, where many of us are going afterwards.  Couchsurfing has come to life for me again in the last few months:  The joy of meeting new people and having those laughter-inducing spontaneous conversations moments afterwards.  So it is with eager anticipation that I eat this soup, bundle up against the snowy night, and get ready to find what Basel's Saturday has to give.

As with all pre-party meals, this one is simple and fast.  I want you to forget mincing, dicing, and julienning, and pick up that butcher knife like a hatchet.  Get ready to CHOP.  That's right, good ol' coarse, gritty, CHOPPING.  I want those veggies chunked, and I want Martha Stewart gasping at the wayside as you whip this soup out so heartily you could make a woodchuck shiver.

Chunky Pumpkin Soup
Consider putting on some Cheb Khaled as you whip this baby up, just to get in the mood.


Ingredients
-1 little round orange pumpkin (squash?  they call them all pumpkins here...any small round orange pumpkin-like winter vegetable oughtta do it)
-2 big potatoes, chopped
-2 big carrots, chopped
-1 big leek, chopped

-1 tbsp fresh chopped ginger (+)
-1 tbsp dried rosemary
-1 tsp yellow mustard seeds
-5 cloves garlic, chopped
-Fresh ground pepper to taste
-1 tsp tamari (opt.)

Lotsa water and as much bouillon as you deem fitting.  (could be none)

Directions
Heat the ghee in a large pot and add the mustard seeds.  Cook, stirring, until they start to pop, and then add the ginger and leeks.  Stir to coat with ghee and then add the carrots, potatoes, pumpkin, rosemary, water to cover, and bouillon.

Cover and cook until the potatoes are tender.  Add the garlic, then puree just a little bit with an immersion mixer, and check the taste.  Add tamari, pepper, and salt to taste.

Read more...

The Walrus Bread

>> Sunday, January 24


Today I had a mad craving for something doughy, so I hunted around for a while for a good minimalist gluten free bread recipe using chickpea flour, which I have right now.  I tried out the simplest one I found, one for Walrus Bread from Bob's Red Mill, a flour mill from northern Oregon which I visited last year with my family.  Though the title has a mischievous ring, the product is a sumptuous, classic brown bread.  I enjoyed mine most with molasses on it, though I didn't complain about the avocado and zatar...or the apricot jam...or the tahini.

My variations were to toss some pumpkin seeds on top before baking, to sue some millet instead of all rice flour, and I used raw sugar.


Read more...

Z'nuni: Brunch for The LGK

>> Monday, January 18


Swiss German has a wonderful way of turning simple words like "snack" into amazing works of condensed thought.  Take, for example, the word "znuni," which basically means midmorning snack.  Nuni is a shortened version of neun, for nine.  The 'i' is the Swiss diminutive suffix, making it cute and little (instead of the German 'schen').  The 'z' doesn't make that much sense to me, but I guess it is an abbreviation of das, the article for 'nuni,' which is surprisingly a noun.

What's my point?  Well tomorrow I have to bring it-not in the cheerleading sense, but in the znuni sense-something for everyone to eat.

It's Switzerland.  Did I mention that?  Well let me paint you a clearer picture of what that means at znuni-that means bread, butter, cheese, and chocolate.  And mandarines because they are the international winter food of western countries.  I eat rice cakes and trailmix.  That is because in Swiss the word for 'gluten free diet' is probably something like 'nichts' which means 'nothing.'  Or 'luft' which means 'air'.  Seriously, as far as most of my classmates are concerned, I must live from water, lemons, and salt, because there's nothing else edible that I could possibly eat.

So today I've decided to bring something fantastic for znuni.  I thought about it a long time and it even merited a parental skype-call to get some advice.  The love child of my fling with znuni is:


The Mandarine Upside-Down Cake

Ingredients
2 1/2 cups flour or 2 cups flour* (or sub a little hazelnut meal)
1 1/2 tsp baking powder
1 tsp baking soda
1 1/2 cups sugar (yikes!)
1 packet vanilla sugar
1/4 cup dried cranberries
4-5 mandarine oranges (plus more for juice, if you want to use fresh juice)
1/2 cup margarine plus  4 tablespoons melted
pinch of salt
1 tsp xanthan gum
3 eggs
1 cup (I used half coconut milk, half mandarine juice)

Directions
Melt the 4 tbsp margarine and pour into a round cake pan.  sprinkle with 1/2 cup sugar.  peel the mandarines and slice them so that they look like pineapple rings, with cross-sections of the segments showing, and lay the rings out in the pan.  fill the spaces between with the dried cranberries.

cream the butter and sugar.  Add the eggs and vanilla and beat until fluffy.  transfer to a big mixing bowl

mix the dry ingredients in a medium bowl.  Alternate the dry ingredients in 3 parts with the milk in 2 parts as you add them to the fluffy egg mixture and combine.  (flour, milk, flour, milk, flour).

Pour into the pan and bake at 175 C for about 30 minutes, until it starts to come away on the sides.  Remove and let cool until you can remove it from the pan.  Then flip it and let it cool completely or serve still lightly warm.

Notes
*My mix was: 1 cup millet flour, 1/4 cup potato starch, 3/4 cup rice flour (mix-red, white), 1/4 cup ground hazelnuts, 1/4 cup corn flour

Read more...

More Lentil Balls

>> Sunday, April 12

Every time I get lost in my kitchen, I cast out in the darkness for a helping hand and who do I find?  My good friend Beluga.  Beluga Lentil, that is, and he never ceases to amaze me with his solutions to my ponderings, as in today's :'what can an anti-candida, gluten-free vegan eat?


Answer: More lentils.  In ball form, they look less like lentils, which is good, because i'm starting to see them even with my eyes closed this week.  These, however, could be falafel with a suntan, and I didn't think once about the fact that I was eating lentils.  Again.

Simple Double-Lentil Balls

I was out of lemons, but I think a litle lemon juice in here would have been fantastic. For non-ACD eaters, add a splash each of apple cider vinegar and braggs for some kick.

1 cup beluga lentils
1 cup red lentils
1/2 cup amaranth

1 leek or onion, chopped
1 turnip, grated
1 tsp pepper
1 tsp salt
1/2 tsp turmeric
2 tbsp fresh chopped rosemary
6 cloves garlic, chopped

2 tbsp sesame oil
1-4 cup pumpkin seeds

Add 3 cups of water to the lentils and amaranth in a saucepan.  Bring to a boil, cover, and cook until the water is absorbed and the red lentils have broken down (add more water if necessary).  Stir vigorously and cook until the mix is very thick and sticky. 

stir in the rest of the ingredients, reserving the oil and pumpkin seeds.  Mix together into a thick dough.  Roll about 2 tbsp of dough into a ball, brush with oil, and stick 2 pumpkin seeds into the top.  Place on a parchment-lined or grased baking sheet and repeat until you used it all. Bake for about 30 minutes, until browned and crispy on the inside.  

Serve with Lemon Zatar Yogurt Dressing or Luscious Tahini Whip for a protein-ilicious vegan main dish.  Or, toss with rice noodles and tomato sauce and you have spaghetti and meatballs!

Read more...

Enchanted Broccoli Forest-Fire: A toasty stove-top rendition of the classic casserole

>> Thursday, April 9


The Enchanted Broccoli Forest, one of Mollie Katzen's many beautiful cookbooks, is one that I treasure. Daniel and I got a copy in the states when we visited last summer and backpacked around for two months with it gingerly wrapped in layers of bags so as to get it safely back to the old continent. Here, we hoard it like miserly jewel-collectors, rarely daring to open its gleaming depths to those who pass through Dani's kitchen, where it sits discreetly behind a Moosewood. After all, cookbooks like that are hard to come by here, and you never know what a Swiss foodie might do if she discovered there was more to the kitchen than cheese and bread, so we like to initiate people here to the land of good veggie cooking step by step...

Anyway, the cover recipe, The Enchanted Broccoli Forest itself, is amazing, delicious, wonderful, and today, I wanted it bad. However, being the anti-candida eater I am right now, I felt a little weird eating a meal mostly consisting of rice. Also, I just didn't want to deal with baking anything. It's so warm, the birds are singing, the windows are blowing open in the breeze...all this scene is missing is the sizzle and pop of some nutty roasted quinoa.

By using quinoa as my grain, I'm eating a lot more protein and a lot fewer carbs than if I had used the usual brown rice, and lentils are even lower in carbs, being in the legume family. Plus, they're downright nutritious and delicious. We have heaps of Birsmattehof spinach (fresh from our local organic farm), and i just bought broccoli, and Hari gave me some of the succulent little sundried tomatoes Niki brought back from Israel, so it seems we have a contestant for today's mind-blowing anti-candida cookoff (a competition taking place solely in my head, but none-the-less a worthwhile pursuit). For those of you who don't have candida problems, feel free to spice it up a bit with with...whatever. I actually don't know why you'd want to improve on this amazing dish, I just keep imagining that everyone who can eat sugar must be enjoying something I'm not. But not today. No sirree, I've got one up on sugar cravings this evening.


Enchanted Broccoli Forest-Fire: a toasty stove-top rendition of the classic casserole (for 4)

1 cup quinoa
1 cup beluga lentils
1 medium head broccoli
a few massive handfuls of fresh spinach
1 stalk celery
1 onion, diced, and/or some chopped leek
10 sundried tomatoes (dry or in oil), chopped into strips
any additional veggies you may be craving/have on hand


juice of 1/4 lemon
1 tbsp fresh, chopped rosemary
odorous amounts of garlic (about 6 cloves), chopped
2 tbsp flax seed or flax seed meal
a tiny bit of sea salt
4 twists of fresh ground black pepper

optional: 10 activated almonds, chopped

Directions
Cook the lentils in water until tender, drain, and set aside.

Meanwhile, heat a medium skillet and add your quinoa. Stir almost continuously until the quinoa is browned and smells roasted, 2-3 minutes. Add 2 cups water to the quinoa, cover, and cook until the water is absorbed.

While that's going on, chop up the broccoli, almonds, rosemary, garlic, and all your other veggies (except the spinach).

When the quinoa is done, push it to the side in the pan and add the broccoli, leek, onions, rosemary, and other veggies that need a bit more cooking to the pan. Add a splash of water, cover, and reduce the heat, steaming the veggies for about 4 minutes, or until shiny and tender. then mix it all up, add all the rest of the stuff, and cook until it looks and tastes good, about 4 minutes.
I'm not telling you how to live your life here, but I highly recommend some Lemon Zatar Yogurt Dressing over a nice hot bowl of this for a zingy mediterranean flavor combo that's out of this world.

Read more...

Banana Cakes for the Masses

>> Wednesday, April 1


Migros, a massive supermarket chain in Switzerland, seems to hate ripeness. They like their avocados with the squeezability of hand-grenades, their tomatoes the color of blushing porcelain dolls, and the oranges...well, "blond" is not just the variety name.

I know this because the rack of discount items by the door is always filled with the ripest items-already marked half price because obviously the potential of smelling a ripe fruit is grounds for composting. This is especially true with bananas, one of the touchiest fruits known. The acceptable bananas leer their green little smiles at me every time I go in, and if you're like me, and don't plan your cooking projects, there's no time to buy emerald bananas and wait for them to mature.

Point being, Eve struck gold last week and found a bag of about 15 bananas, perfectly ripe and only one or two with a hints of brown spots on the stems, for just over 3 francs. That's called 'a score,' for those of you uninitiated into my mom's shopping world. Anyway, when life hands you bananas, make banana cake. I made two, and it felt good. Real good.

For all you gluten-boycotters, I am very sad to say that one was NOT gluten-free...probably the first gluten-containing product I have made in 2 years. But I made it for the folks at B. Yoga to enjoy, and it seems needless to deal with gluten-free baking for people who mostly don't care...well, I still felt guilty measuring up wheat flour, like a shadow from the past was lurking around the corners of the mixing bowl, but I stayed strong, and the cake was rumored to be good, so you can make it for someone you love but has unfairly strong digestion, or you can just modify that little puppy and see what's what.

The base recipe was for Tried and True Banana Bread from Savvy Vegetarian. I used half spelt, half wheat flour, powdered egg replacer instead of the cornstarch mixture, and margarine instead of oil (unusual, but I had it). I also hucked in the last of the dried bananas, chopped up into rounds. I didn't bother taking a picture, because who cares, it has gluten anyway. Grin...

The other, the edible one, is essentially Karina's Sweet Banana Polenta Cake, from the always fabulous Karina's Kitchen Blog, with just a smidge of Erinization:

I did egg-free, with egg replacer for somewhere around 2 eggs,
random leftover soy creamer for the milk,
margarine for oil,
vanilla bean instead of extract,
an added grated apple because...I can,
and my sugar was actually a blend of 1 tbsp molasses, 2 tbsp agave, and 2 tbsp sugar beet syrup.

I also chopped up a banana and stirred it in to get nice melted banana chunks in the finished cake, which was so good I think I should triple the amount of chopped banana next time-and you should too.

Read more...

Breakfast Kuzu with Quinoa-A Cure-All Treat

>> Wednesday, March 25


Ok. they're not the most beautiful photos we've ever seen,
but porridges are rarely photogenic. Have faith, it's amazing in person.


If you've ever seen an under-slept student with the flu, then you know exactly how Daniel showed up at my door one morning a few weeks ago: a little green, to say the least. He looked like an underfed stray, and he nodded at the comment (couldn't help myself), adding that in fact he hadn't been able to eat much for 3 days. I immediately flashed on an article I had read on the medicinal qualities of kuzu, a Japanese starch used for making custard-like drinks. It is foremost considered a good way to get nutritious herbs into a sick body without disturbing sensitive stomachs. Bingo!

As I'd never tried kuzu, and didn't want to miss the fun, I decided to make something palletable to healthy folk too-sort of a breakfast porridge with protein-rich quinoa, digestion-aiding spices, and lotsa love. Woweeeeee that stuff as good, and I can't believe it was healthy it tasted so sinfully sweet and yummy. You could have it as a breakfast or a light dessert, and no one would be the wiser for it.

Chai Kuzu with Quinoa
serves 2 hungry folk, or three modestly peckish chaps

3 tbsp kuzu powder
1 cup quinoa
1 cup rice milk
2 inches ginger root
5 cardamom pods
3 cloves
1/2 tsp cinnamon
1/2 tsp nutmeg
1 tbsp molasses
1 tsp agave or maple syrup
1/2 tsp vanilla extract (optional)
1 1/2 cups water

garnish of choice (optional)

Directions


Dissolve the kuzu in 1/4 cup milk and set aside.

Bring the water and quinoa to a simmer, reduce heat, cover, and let cook until the quinoa is almost done, about 15 minutes. Meanwhile, grate the ginger root and sqeeze out the juice through a tea strainer or seive, discard the solids.

Add the remaining 3/4 cup milk to the quinoa, stir, and then add the kuzu-milk, stirring well.
Add all the other ingredients except vanilla, bring to a simmer again, and continue to cook 5-10 minutes, or until well-thickened to a pudding-like consistency, stirring occasionally. If necessary, adjust the amount of milk to thin the porridge. I like mine thick :)

Serve with yogurt, kefir, chopped nuts, fruit, or a drizzle of rice milk on top. Scrumptious!

Read more...

Mustard Sprout Salad and Herb-Strewn Roasted Beets: A Light Late Lunch for Sunkissed Evenings


Some days require a little love packed in your lunch box. Yesterday, it was the way the sun incubated me through the window, slowing me down to the momentum of a boozy sunbather. I just couldn’t tolerate anything blah in that luxurious light, so I cooked a fantastic meal and served it still warm at work for an extra-special Tuesday treat.

Herb-Strewn Roasted Beets (for 1. It’s pretty easy to up the output, just add more beets!)

Ingredients
1-2 washed, whole beets, greens removed and saved for something tasty later
1 tbsp olive oil
1 tsp fresh or dried thyme
a dash of Herbamare or other herbed salt
1 tsp oregano, marjoram or thyme, or combination

Directions
Preheat the oven to 350 F (175 C)
Rub the oil onto the beets and lay them on a sheet of tinfoil. Sprinkle the thyme and a drizzle of water over them and wrap the tinfoil securely around them.
Bake for 30-40 minutes, until tender.

To serve, slice each into rings, removing the skin if you wish, and arrange overlapped on a plate. If they seem dry at all, brush or rub a drop of olive oil onto the cut surface. Dust with salt and the remaining herbs.

Very Simple Mustard Sprout Salad (for 1. Easily, easily increased, substituted, and supplemented)

Ingredients
2 tbsp mustard seed sprouts
½ small head of chicoree
1 medium carrot, grated

2 tsp wine vinegar
1 tsp sesame oil
a squeeze of lemon juice
a dash of sugar, agave, or maple syrup (optional)
a pinch of salt
a grate of pepper

Directions
Slice the chicoree into rounds and toss them with the sprouts and carrots.
Mix together the dressing ingredients and toss it all up. Fertig!

Read more...

Tahini Cookies Three Ways

>> Tuesday, March 24


There are infinite ways to finish off this recipe with your own personal touch. I fully encourage such experiments, and I offer you one of my weird variations here for a little idea of what you could do. The ground recipe is the same.

Tahini Cookie Dough
(Ground Recipe)
1/3 cup tahini
¼ cup sugar beet syrup or other syrupy sweetener
¼ cup ground hazelnuts
½ cup rice flour (plus a few tbsp)
1 tsp baking powder
1 tbsp margarine (optional)
1 tbsp water or as needed

Mix the tahini, syrup, and margarine, if using.
In a separate bowl, whisk together the dry ingredients, then add them to the wet and mix. If it is too dry to come together into a ball, add some water and try again. If it is a bit too oily (mine was, after the addition of margarine) add the extra flour.

For simple Diamond Cookies, roll the dough out on a floured board to about 1/4 inch thick and slice into diamond shapes. Then bake for about 15 minutes at 350 F (175 C), or until they are just touched with color on the edges. Careful, these over-cook quickly!

Oatmeal-Style Raisin Tahini Cookies

These involve no oats, but they sure remind me of the delicious oatmeal cookies my mom used to make...chewy, fruity, hearty, and best still warm from the oven.

To the ground recipe, add:
2 large carrots, grated
1/4 cup rice flour
1/2 cup raisins

Adjust the flour-water ratio as needed to get a thick, but workable, cookies dough.
Roll 1 tbsp of the dough into a ball, then flatten it into a cookie shape and repeat for the rest. Bake for 15-20 minutes, until lightly browned and firm enough to hold together. Let cool on a rack (barely) and enjoy :)
Also check out the directions for Dessert Sushi to see another adaptation of this ground recipe.

Read more...

Calico Kichiri and Rosemary Roasted Carrot Hash with Fresh Sprouts

>> Thursday, March 19


I looooove lentils. LOOOOOOOOVE them. All colors, shapes, sizes, and preparations. Which is probably why I can’t really manage to discriminate when it comes to creating Indian lentil dishes. Kichiri is ‘supposed’ to be made with red lentils, which is fantastic, but I wanted black lentils today, so that’s what I made. Continuing the blasphemy, I added nutritional yeast to imitate the consistency of red lentils. Recipe-sticklers beware, it was sinfully good and I don’t regret a moment of it.

The roasted carrot hash was half glorious inspiration and half poor planning-Having seen the roasted carrot dip on Just Bento, I thought it would be a perfect spread for the yummy cornbread my roommate just cooked up. After roasting the carrots, I remembered for the 100th time that we broke the food processor a few months ago. Huh. Carrots are not very mortar and pestle friendly. I used a bread knife to hack them into tiny pieces, and tried anyway, but the slippery little suckers still evaded all mushing attempts and just squirmed around my mortar mischieviously. Confounded, I tossed them into a bowl and drizzled balsamic vinegar and bragg’s over them, tossed, and tasted-WOAH that’s good!


The mustard sprouts and steamed chickpea sprouts really topped off the simple kichiri and tangy carrots. I steamed the chickpea sprouts for about 10 minutes on the lowest heat to get them tender and served them still warm over everything. So-oh-ohhhhh good. I ate two helpings and packed more for dinner, because with this good of a taste, repetition is a blessing!

Note: for the record, this meal was so satisfying I couldn’t manage to eat any more for dinner. The magic of sprouts, veggies, lentils and rice is that it’s absolutely everything you need and want, all in one delectable bowl.

Calico Kichiri


Ingredients
1 leek, sliced into rounds
1 small red onion, roughly chopped
1 cup brown rice, long or short grain
¾ cup beluga lentils
3 cups water

½ tsp cardamom powder, or 4 whole pods
1 tsp turmeric powder
3 cloves garlic, chopped (or some garlic powder-I admit it, I used powder today…)
1 tsp finely chopped ginger root
1 tbsp nutritional yeast
½ tsp cinnamon powder
2 tbsp oil

Directions
  1. Heat the oil in a saucepan over medium-low heat and add the onions and leek. Cook, stirring, until they are tender and shiny.
  2. Add the spices, garlic and ginger, continuing to stir. Scrape the bottom of the pan if it starts to stick, and just keep stirring for about a minute.
  3. Add the lentils and rice, still stirring, for 1 more minute.
  4. Add the water, cover, bring to a boil, and reduce heat. Cook for 30 minutes or until almost all the water is absorbed and everything is fully cooked.
  5. Stir in the nutritional yeast. There should be a little liquid left to create a saucy consistency with the yeast-if needed, add a drop more water, and you will get a wonderfully thick mush as it cools on the plate, stiff enough to stay on the spoon when you turn it sideways.comfort food consistency!

Rosemary Roasted Carrot Hash

Ingredients
4 carrots
1 very large sprig of rosemary
a pinch of salt
2 tsp bragg’s or tamari
2 tsp balsamic vinegar

Directions

Preheat the oven to 350 F (175 C).
Wash the carrots and chop them into large chunks. Sprinkle them with a bit of salt, set the rosemary on top, and wrap it all in a piece of foil. Bake for 30 minutes, or until tender.

After they have cooled for a moment, use a large knife to dice the carrots into very small pieces. Minced might be the word. Toss them with the vinegar and bragg's and serve over or beside your main course, warm or cool. In the summer, we’ll have to revisit this with fresh basil leaves chopped up in it…

Read more...

Spicy Chickpea Salad (makes heaps)

>> Wednesday, March 18


“How about hummus?”
“I don’t know, it’s such a pain, and we don’t have a food processor.”
“Ok, just a tahini dip.”
“Ok, good.”

Yet later that night, preparing everything for the yoga and brunch workshop, I felt that hummus was necessary. It was obviously a delirium-induced conclusion, because as I finished cooking the chickpeas early the next morning, I knew immediately that we had too much food and not enough time to make 400 grams of chickpeas into hummus with a mortar and pestle.

Hurrah for mistakes, because the resulting salad is a very welcome addition to my recipe collection. I have been enjoying (a lot of) it by itself or tossed with fresh greens. Actually, if you wanted to, you even COULD toss it all in a food processor and make hummus after all!

In fact, I am thinking that later this week some falafel might grown where the salad was planted...I'll keep ya posted.

Spicy Chickpea Salad

Ingredients

4 cups cooked chickpeas
1 large green bell pepper
4 carrots
1 cup mung bean sprouts
½ cup chopped parsley (plus 2 tbsp garnish)

Juice of 1 lemon
2 cloves garlic
½ inch ginger root
2 tbsp miso paste
salt and pepper to taste
2 tbsp bragg’s/tamari
½ cup oil
½ cup white wine vinegar
¼ cup water kefir or some water + another vinegar of choice + a dash of sugar
1 tsp hot paprika
1 tbsp zatar (plus 2 tbsp garnish)

Directions

Chop the bell pepper and carrots into small chunks.
Into a large jar, grate the ginger and garlic. Add the other dressing ingredients, mix, and pour over the salad. Let it sit for an hour or two in the fridge before serving, then garnish with the zatar and parsley.

Read more...

NorCal Dolmas (and no-waste rice milk!)

>> Tuesday, March 17

Fresh, sticky dolma filling

Of all the teachers I’ve had in my life, a few of them stand out like gold embossing in my memory. One of these radiant individuals is Jon, the counselor from my high school. He and his wife, my art teacher, are two of the spunkiest folks I’ve ever met, and the things I’ve learned from them go a long way past the classroom. Like, for example, into the kitchen. Before moving into teaching, they ran a little restaurant in California and the cooking bug as never left them as far as I can tell.

Last summer, as Sheri scrambled to finish a huge multimedia piece for her art show (that night-artistic procrastination at its best), Jon entered the kitchen with an armload of groceries and a determined jut to his jaw. “We’ve gotta make a lot of food,” he informed Daniel and I, and, wow, did we ever.

I recalled all this last week as I prepared for the Yoga and brunch workshop at B.Yoga Basel. with a bunch of yogis to feed, Jon’s dolmas sprang to mind immediately as an easy, tasty, and for some reason ‘impressive’ dish that I could bring. Everyone likes dolmas. Not just for soulful combo of tangy lemon and spiced rice, but there’s something about the presentation of it all in a slick green grape leaf that makes you think, “I am dining exactly as Caesar would have dined, and for that, I am magnificent.”
Enjoy the illusion of grandeur; just don’t tell them how easy it was to make them. I didn’t manage to get a picture, but I think that’s a fairly good selling point, don’t you?


NorCal Dolmas (makes about 60)
This recipe is modified to simultaneously cook the rice and make rice milk which is not necessary, but COOL. See the notes section for more information on alternative methods and the who-what-why's...

Ingredients
1 jar grape leaves (preferably without the “acidity regulators” and “E-whatevers”)
5 cups short grain brown rice, soaked overnight in twice as much water
3 lemons
400 grams raisins, finely chopped
lotsa cinnamon
a pinch of salt
a grate or two of nutmeg (if you’re feelin’ lucky)
¼ cup olive oil (hugely flexible amount)

Directions
  1. Without straining or rinsing, add 2 cups of water to the rice and cook, covered, until tender.
  2. Strain the rice and set aside the liquid (add a tiny pinch of salt and some sugar and you have rice milk! Now that was easy!)
  3. To the rice, add the raisins, cinnamon, salt, and nutmeg. Stir it all up and be ruthless so the consistency gets good and gooey. You want it to be self-adhesive so it doesn’t crumble when you bite into the dolma.
  4. Add the grated zest and juice of 1 lemon at a time, tasting after each one to make sure it’s not too sour. Adjust the spices to taste. If needed, add a little bit of the rice milk to get the stickiness level up.
  5. Drain the leaves and unfold them on a clean plate. Taste a broken one (there’s always at least one) to make sure it’s not too salty or acidic, and rinse them quickly if it is. If they aren’t flavorful enough, add a dash of apple cider vinegar to the rice mixture.
  6. Pour a tablespoon of oil onto another plate, set a leaf in the oil with the vein-ey side up and the stem facing you, and push the leaf around to coat the plate in oil. Depending on the size of the leaf, fill it with about 2 TBSP filling, fold up the bottom, tuck in the sides, and roll it to the top. Voila!
  7. Repeat until the oil is gone and add another tablespoon of oil. A nice touch is to add some sliced lemon-rounds.
Notes
The directions here say to soak the rice. This increases digestibility whether you choose to do the rice milk thing or not, and I recommend soaking all grains overnight before cooking for this reason. Here, the soaking also induces some milky qualities in the water that let us make rice milk later by adding some extra water. Thus, you have 3 choices here:
You can
1) Follow the above directions for rice milk and rice
2) Soak the rice but skip the additional water and straining process, giving you really stomach-friendly rice, which might be nice with all the dried fruit going on here, OR
3) Cook the rice like most people cook rice-stick it in a pot with some water and just cook it, no soaking, no extra water weirdness, no random milk biproduct. Your choice!

Read more...

The Son of Franken-Crepe: Erin's Kitchen Disaster

>> Saturday, February 28


Can you find 5 things that are different between these pictures?
Hint: the direction of the wood grain and the spatula are not the answers we were looking for


I realized yesterday, reading over squeaky mouse’s blog for dessert ideas, that I should confess something. I often…OFTEN…mess things up in the kitchen. It’s part of the process, and none of the recipes here would exist without the 3 mutilated versions immediately prior. The convenience of blogging is, I can post whichever picture I want. But just for a change of pace, let’s see the other side of Erin’s kitchen today.

I’m in pancake mania, and being home sick isn’t helping anything. Someone, tell me, what do you do when you’ve got 500 recipes to try, most of them involve fermented doughs, you’re bored out of your mind (even though you have many better things to do), and it’s breakfast time? Shhh…you’re not actually supposed to give an answer. I like mine. You make fermented buckwheat crepes.

I made the batter yesterday as an experiment because we’re planning some sourdough pancakes this weekend (the binge has no end in sight). It’s been sitting in the living room doing its yeast-gathering thing, and is definitely not a bubbly sourdough starter today, but it’s got a nice eggy texture that was wholly unexpected. I’ve got some leftover Country Corn and Potato Stew (recipe forthcoming), also unexpected, so we’re kickin’ it Erin style and slapping two completely unrelated food items together for a single-serving breakfast, just because we can.


Basic Recipe
Makes 1 mini crepe and 1 shriveled bat-ear look-alike. A useful quantity for 1 not very hungry child

Put1 tbsp canola oil, a dash of salt, and a grind of pepper into a jar.
Add in about 1/3 cup of your fermenting starter (chickpea and buckwheat flour with water, left to sit overnight), which you weren’t supposed to use for another 2 days.
Add a splash of water to get the consistency right, and if you have water kefir or kefir whey handy, use that instead to get some tang in there.

Heat the pan (mine is nonstick, and I didn’t oil it) for about 1 millisecond and toss 1 spoonful (clearly not enough) batter into the pan. Pause thoughtfully as you realize your mistake, then drizzle more batter around the original plop, and turn the pan to coat the bottom, which won’t work because the center is already firmed and the outside is still to runny. Don’t worry, it’s all part of the plan.

Because it seems better to get this painful thing out of the way as quickly as possible, flip the bat-ear before it’s even lightly browned. It should gum up on the spatula, stick to the bottom, and break in multiple places. Then you can attempt to cleverly fold it in half, because…Jesus, I have NO idea why. It seemed logical at the time, but I can’t justify that at ALL. This will make things worse, because it has now dried out too much to fold, and in a fit of panic, you can heave the thing onto the table “tsk” ing. Whisper: “Curse you, you crepe-bastard…”

Don’t worry, we’re almost done. Then you can turn the heat up to just over medium, mix a little more water into the batter, and dump it all into the pan. Amazingly, miraculously, like wine from water, the puddle of monster goo blooms into a lightly sizzling crepe, which, a few seconds after pouring, is ready to be gracefully flipped onto it’s white belly and cooked to golden perfection.

Serve with warmed leftover stew and a few finely chopped leek greens on top. Mop up the liquid left on your plate with the leathery mutant crepe, because one small crepe is not very much food and it's already too late to make something else. Bonus: you've eliminated the evidence of just how badly you can cook.

(Although, this version was actually really good.)

Check back tomorrow for the perfected recipe of sourdough buckwheat crepes!

Read more...

Roasted Beet Risotto with Sage and Chickpeas

>> Wednesday, February 11


(Risotto served here with sauteed chard, leek,
and lentil sprouts, and vegan mint raita)

The only beef I have with rice dishes lately is that I crave something, simply, juicier. I love a bowl of brown rice, and with some tamari and nutritional yeast to moisten the grains, it’s certainly enjoyable. I might describe it as satisfying, healthy, nutty, and earthy. Great. But it’s a far cry from mouthwatering, or fingerlickingly creamy, which is what I really want this week. I’m searching for something more like the vegan, gluten-free equivalent to the texture of fresh-grated parmesan melting over basil lasagne.

Enter risotto, the transvestite, showgirl sister of the simple boiled rice bowl. How often have I heard brown rice dishes defined by non-vegans as “why they would never go vegan”? Enough to know that they are not thinking outside of the box. A brown rice risotto is a truly luxurious meal, and one that everyone can enjoy, vegan, omnivore, and devout carnivore. This one is so tenderly soft, melty, and moist I think even my Swiss roommate would forget to ask if it had cheese, and of course, we know the answer.

The creaminess I was hunting came from an unexpectedly perfect source. To start, I knew I didn’t have wine to use in my risotto, and I found myself dreading the lack of such a crisp, dry flavor. I peeked around the fridge and tried to think of something with that special “bite” a steaming white wine gives. Vinegars just weren’t going to cut it, likewise homemade pickle-brine. And then-Aha! The aged soy kefir whey on the windowsill caught my eye.

When you let a kefir whey age outside of the fridge, the beverage takes on a wine-cooler kind of quality, with an alcoholic edge to its original sour flavor. The clear, zingy drink has something strongly reminiscent of white wine, and even provides a bit of a cheesy taste too. From using water kefir for wine, it was just a short jump to using soymilk kefir for cheese, and voila, a creamy, edgy risotto lacking none of the richness a dairy version promises.

The beetroot gives a beautiful color and lovely sweet flavor to the dish, and celeriac and carrots finish off a wonderful trio of seasonal root veggies. Sage, fresh-picked from the front yard, not only looks great with the purple beet, but adds a slightly smoky undertone to the mix. Finally, chickpeas partner up with rice as our vegan serving of complete protein (grass plus legume) and lend a soft nutty texture in the process. Altogether, a multicultural, healthy take on risotto that practically sighs for you as it touches your taste buds.


Roasted Beet Risotto with Sage and Chickpeas

Ingredients:
  • 2 cups short or medium grain brown rice
  • About 5 cups of veggie stock or water*
  • ½ onion, chopped
  • 3 medium carrots, chopped into half-rounds
  • ½ celeriac, cubed
  • 1 very large or 2 medium beets
  • 1 1/2 cups cooked chickpeas
  • 3 tbsp fresh sage, chopped
  • 3 tbsp fresh rosemary, chopped
  • 5 cloves garlic, finely chopped or pressed
  • ¼ cup olive oil
  • ¼ cup soymilk kefir**
  • ½ cup kefir whey (or dry white wine)
  • ½ tsp ground black pepper
  • salt to taste

Directions:
  1. Wash the beets and remove the greens***, being sure not to chop into the beets (leave a little stem). brush them with olive oil, wrap in aluminum foil and bake at 350 F (175 C) for 30 minutes, or until tender when poked with a fork. Let cool. Grate ¾ of the beets, coarsely chop the rest.
  2. In a large pot, heat the oil and add the onions, stirring. Add the pepper and a dash of salt, and cook until the onions are transparent.
  3. Add the rice, stirring, and cook for a few minutes, until the rice is very lightly browned and shiny.
  4. Add the kefir whey or wine and stir for another minute or two, then add the grated beets and ½ cup stock or water, continuing to stir until all liquid is evaporated. Repeat this until the rice is about half done.
  5. Add the herbs, carrots, celeriac, and 1 cup of liquid. Cover until the veggies are almost done (check that there is still liquid, stir and add more if necessary, then cover again).
  6. Stir in the chickpeas, chopped beets, and milk kefir. Taste and add salt if needed, and more kefir if desired.

Notes:
*I used water and a splash of homemade kimchee brine. **You could probably use soy yogurt too. If you’re not a vegan, obviously some parmesan will do! *** SAVE YOUR GREENS!!! Chop them up and toss them in if you like, or sauté them for a gorgeous side dish to the risotto.

(I'm considering a new name:
"Disappearing Act Risotto." The bowl
never seems to stay full...)

Read more...

Five Minute Balsamic Tipped Veggies

>> Tuesday, February 10


I thought it would be impossible to make something this delicious and healthy in less than 10 minutes, but sure enough, it took just 5, even with an electric stove to slow the process. The nice thing about cooking with Swiss regional foods is that it’s incredibly easy to make authentic Italian flavors too, and the oregano, balsamic vinegar, and fennel all lend themselves perfectly to this Swiss-Italian fusion.

Five Minute Balsamic Tipped Veggies

Ingredients (for 1. Multiply by the number of people to be served for a side, or multiply by 2 for each person for a main dish):

  • ¼ large head of fennel, sliced into strips.
  • 1 yellow (or other) carrot, sliced into rounds
  • ½ tsp dried oregano
  • 1-2 tbsp balsamic vinegar
  • 1 clove garlic, chopped
  • a few tbsp water
  • a pinch of black pepper
  • 2 round slices of lemon

Directions:
  1. Heat a skillet over medium flame for just a moment before tossing in the carrots, fennel, vinegar, and some water. Stir to coat and cover quickly.
  2. When the liquid has evaporated, continue stirring with a bit more water, and add the pepper, oregano, and garlic.
  3. Add the lemon and increase the heat for 1 minute, stirring, to give a browned, roasted edge to the veggies.
Finito!

Read more...

Butternut and Fennel-seed Miso

>> Thursday, February 5


To think that just one month ago I had never even used miso in a recipe is almost beyond me. It has been in everything I make lately, and it seems to provide that magical “oomph” I sometimes crave but can’t quite place (umami...). A friend of mine offered to cook lunch for me a few days before she moved to Germany last week, and she brought me to a realm of miso-induced-ecstasy I never dreamed could exist. Fresh leeks sautéed in sesame oil with turmeric and fennel-seeds, plus flavorful red onions and fresh ginger made one bowl of it enough to tempt me into packing my bags and swimming to Japan, which is where she learned to make it. Along with her suggestion of adding pumpkin or squash and the inspiration of watching her cook this soup to perfection, I have created my own version:

Sauteed Fennel and Butternut Miso

Ingredients:

  • 1 piece dried kombu seawead (optional)*
  • 2 sheets nori (optional)
  • 2 tiny or 1 small-medium red onion
  • 2 tsp finely chopped ginger
  • 1 fresh leek, finely sliced in rings
  • 1 hea dof fresh fennel, thinly sliced
  • 1 cup diced pumpkin
  • 1 cup diced tofu, firm
  • 2 tbsp turmeric powder
  • 2 tbsp fennel seeds, whole
  • 4 tbsp sesame oil
  • 3 tbsp miso (Christina used Mogi, but it’s not GF, so use any that is)
  • 3 cloves garlic, minced
  • gomashio to taste (a few tsp) (optional)

Directions:
  1. Soak kombu for 5 minutes in about 6 cups of water, then cover and cook for about 20 minutes. Set aside.
  2. Meanwhile, heat 1 tbsp oil in a frying pan and add the tofu, stirring to coat all sides. Add some gomashio and a splash of the kombu stock, cover, and cook until the stock is gone and the tofu is lightly browned.
  3. In your soup pan, heat the rest of the oil and add the turmeric, fennel seeds, onions, garlic, and ginger, stirring as you go. Cook for a few minutes over medium-low heat, then add the fennel, leek, and pumpkin with a splash of kombu stock just to moisten them. Lightly sautee the veggies for a moment, then add the rest of the stock and cook until the leek is lightly tender.
  4. Remove from the heat and let cool a few minutes before adding the miso, to make sure you don’t kill it.
  5. Dip out a ladle-full of soup and dissolve a spoon of miso into the ladle of soup, then empty the contents back into the pot. Repeat for all the miso, taste, and adjust anything you need to. Serve with the tofu on top and gomashio and crushed nori as garnish.

Notes:
*If you don’t have kombu, just use water

Read more...

My Snow-Day Comfort Food: White Bean Stew with Butternut Filets

Just…I don’t need to explain. Butternut has a reason for its name, and with a light steaming it melts over this country-style stew like dairy-fresh cream. Heavenly. The soup itself is essentially the stewed version of White Bean Bucket Salad, because I can't get enough of the flavor, all the ingredients are local and seasonal (except gomashio, kombu, and tahini!) and because it's such a satisfying, nutritious meal. I owe much inspiration for this one to my mom, for her insistence on white beans as super-foods, and Farmgirl Susan for her Roasted Garlic Lover’s White Bean Soup. Enjoy a bowl while nestled with a frost-laced view of winter and a slice of recycled bread, my gluten-free specialty.

White Bean Stew with Butternut Filets

Ingredients:

  • 2 cups cooked white beans (if cooked with kombu seaweed, save the water)
  • 4-6 cups kombu stock (or water/veggie stock)
  • 4-5 carrots
  • 1-2 potatoes
  • 2 turnips
  • ½ head of celeriac
  • 10 slices of butternut squash
  • 1 onion
  • 1 head of garlic
  • 1 big sprig of fresh rosemary, chopped
  • 2 tbsp tahini
  • 2 tsp thyme
  • 2 tsp oregano
  • salt and pepper to taste, and/or gomashio garnish (mmmmm)
  • ¼ medium white cabbage
  • 2 tbsp oil
  • a splash of rice wine or apple cider vinegar (opt.)
  • ½ cup sprouted chickpeas (opt; garnish)

Directions:
  1. In a soup pot, bring your stock to a boil and add carrots, potatoes, celeriac, onionsand turnips, all coarsely chopped. Cook until potatoes are almost finished.
  2. Meanwhile, separate the garlic cloves and put, unpeeled, in a little oven-safe dish, sprinkled with water and covered with tinfoil. Bake for 30 minutes at around 350 F.
  3. Add the cabbage, finely chopped, the beans, and herbs to the soup and simmer until the cabbage is soft.
  4. Peel the garlic and put it in a medium sized bowl (or food processor, blender, etc) with 1/3 of the soup and the tahini. Blend until fairly well-combined, and add back to the rest of the soup with a splash of vinegar if using. Blend more if desired, or add more stock as needed. But really, thick is gooood!
  5. Heat oil in a frying pan and add the chickpeas and squash slices. Turn a few times to coat with oil, then add a splash of water, quickly cover, and steam until both are just tender.
  6. Add a pinch of gomashio (or salt), turn quickly, and remove from the heat.
  7. Serve the soup with the squash and chickpea mixture on top, and fresh oregano or thyme if available.

Read more...

Meditations on the “Moral Food” Conundrum

>> Thursday, January 29

Inspired by a bite of:
Tender Elstar Apple Cake

Today, biting into my adaptation of a classic Swiss apple-polenta dish (straight from Betty Bossi!), I paused to think about the culture that had inspired me to make it. The flavor was light and simple, yet satisfying and oh-so-homey. Still, apparently food for thought.

Let’s be honest; Switzerland is a land of agrarian fanatics. It’s not something to scoff at either. I have nothing but respect for anyone who devotes their life to producing good food-and Swiss farmers seem to have gotten that one to a T, even if they have a bit of a "short man complex" about their specialty. Yes, for some strange reason, Swiss people are usually either embarrassed about their country’s history of stubborn agricultural productivity (these would be, obviously, not the farmers), or suspiciously quick to point out how steadfast and impressive the Swiss agricultural system really is (yes, farmers talking here).

I can’t help but smile at anyone who is embarrassed in front of me about their country’s history. I am an American, which means a certain amount of humility when it comes to claiming my nationality, and I would never judge a country based on how it has been in the past. The point is what I am experiencing here right now. Learning about Swiss cultural history is easier here, now, in this small, mountainous country, filled with patchworks of grain fields, cow pastures, and milk production facilities, than any textbook could ever describe it.

One of the most tell-tale signs that farmers are a revered force in the Swiss population is the fairly close attention that even big supermarkets pay to stocking local food products. Well, part farmer-appreciation and part stolid nationalism, to be fair, but the result is still nice! Even massive corporate shopping centers often list the name of the farmer who grewthe vegetable you’re holding and the address where it was grown. Wow! When I stroll around the farmers markets it is an even more lovely spread of local fresh vegetables, and fruits, and fine, handmade vinegars, pickles, and jams; and there you get to look the grower in the eye, essentially, and see for yourself the life of work that went into your carrots.

Of course, Switzerland is most notoriously a cheese- and chocolate-loving nation, which can’t help me a lot as far as vegan-food-adventures go (yes, I tried anyway, with awful results, peer pressure still being a driving force in ‘adult’ life apparently!). Here is where history is again evident in the present: With about 2000 years of cheese-making under their belts, a lot of the Swiss I meet would be happy to live off bread and cheese for the next 15 years, easy. Well, and chocolate, clearly. That confuses me-that a people with the potential to grow amazing produce, who live in an ideal way for spreading it to everyone through the tight-knit networks of villages, small cities, and interspersed plots of land, already well-adapted to agricultural work, still devote most of their agricultural energies to the less resource-efficient dairy and meat industries.

All I can figure out is that tradition has a strangle-hold on the food industry, including that of consumption. Much of Swiss life is rife with traditionalism like no Californian could have imagined. Food is certainly no exception. When I ask people here for their opinions, there are two main answers. First, the need for protein-rich foods. This is a straight-shot to the tradition issue. In tribal Switzerland, meat was probably what people had learned to ‘cultivate,’ and with it milk and methods for preserving it. Now that banking is a close runner-up for Swiss cultural value, something tells me that most people aren’t actually hand-milking cows every morning, and the choice is about where their Swiss francs are going, not which food they have the ability to produce. The second is a simple taste preference for dairy and meat products. I can’t really argue with what tastes better to one person or another, but I have a feeling that there’s more to good flavors in Switzerland than Lindt, Käse Fondue, and Würst. Otherwise I would’ve been outta here a long time ago!

But the simple fact is that when you eat some of one thing, you end up eating less of another (ok, modern standards of over-eating aside…). If your first thought for breakfast is a hunk of Gruyere and a slice of topf (like the challah of swiss bread), you’ve just passed up the ripe, juicy plums, apples, pears, and elderberries dripping with natural appeal. How about a bowl of nüsslisalat (corn lettuce), grated celeriac, and purple carrots, all native, seasonal veggies (yes, even in January!)?

Let’s think further, to the simple, rustic cuisine that everyone dreams of mom bringing to the table at Christmas; The standards include potatoes, meat, salad, cheese (raclette or fondue), bread, and lots of cookies and chocolate. The great part is, it’s all local. The drawback? Well, I can’t eat most of it, for one! But also, the focus on meat, cheese, milk products, and wheat means less focus on the amazing variety of heirloom vegetables and fruits in Switzerland, or the wide spread of grain crops that can easily be grown here but are replaced with wheat. about corn? It is evidently completely possible to grow it here, because in fact, quite a bit is. There’s just one catch-like most American corn, it is a variety to be used for cattle feed. One of the common imported items I see is whole corn on the cob, while the pig sliced into your sandwich could have easily been fattened on locally-grown corn! Funny how the world works…

On the other side, we can’t forget that just because something is local doesn’t mean that it is native, or easier to be grown. In the short-term, buying local is almost always better because you are cutting down on the costs, environmental and economical, of importing. But in the long-run, we are often just supporting the chosen monoculture of a given region. Wheat, spelt, and rye are NOT the only grains that grow in Switzerland. For whatever reason, cost, quantity, versatility, or demand, a few crops were chosen for Switzerland to produce on large scales, and that’s the way we’re taught to buy. It’s completely ludicrous to think that only a few kinds of plants are Switzerland-friendly. With major geographical differences from region to region, it’s a country supporting many vastly different microclimates in its small, mountainous confines. For example: Um, the Alps?

Changing something like the amount of agricultural biodiversity in a society isn’t something I know how to do. Do you? Then help me out. In the meantime I can try to cut down on both imported and local-monoculture foods, and eat…well, heirlooms! Lucky for me there is an almost guerilla-like movement of heirloom activists in Switzerland, who distribute the seeds for personal use and research the ‘lineage’ of plant species all the way back to texts from monastery’s of the Middle Ages.

Now, here I sit with a piece of Tender Elstar Apple Cake in front of me. The ingredients are the usual hodge-podge of what I had and what I wanted, and the result is a multi-cultural take on a Swiss tradition. Inside are little South American Amaranth grains, Italian polenta, and cashews from…it doesn’t actually say, and that’s eerie. Everything inside is organic, and some things were locally produced. Some came straight from the farm, like the apples and the elderberry blossom syrup. But how much better is it to enjoy this newly hyped gluten-free grain, fair trade and more well-traveled than most Americans my age, than to buy the Kellogs Corn Pops, which are also gluten-free, cheaper, and produced on the same continent? Well, I would still say it’s better, but it’s not as much of a perfect action as I would like to imagine.

It’s so easy to fall into the traps of advertising and wind up wreaking havoc on our supposed ‘environmentalist’ morals. Where does our soymilk come from, dairy-free eaters? If you make your own, where are the beans grown? Rice milk? Almond milk? How far have the ingredients for your perfect curry traveled? How much plastic should really be involved in buying organic peppers? I just have to think that if what we need is a change in the way we shop and eat, what we need is less mindless extremism and more conscientious decision-making. “I shop all organic” is not enough to make me living well in relation to the environment, the economy, and other individuals. Neither is “I shop local.” It is a complicated, messy state our food has sprouted into, and the answers are similarly messy.

Don’t underestimate your actions! Think!

There is no codified method for ‘good’ actions-the answer always lies in the moment, and to face this is the most honest expression of humanity. When you enter the grocery store, whether you choose the farmer’s market, the local organic shop, the Tesco, the Walmart, or the garden, what you have to work with is always the next choice. Organic and imported, local and sprayed; fair trade from South America or grown next door by underpaid immigrants; packaged or bulk; paper or plastic; savored or snacked; spoiled or saved…Think about it. Enjoy the process. This is living. It is our gift and our eternal possibility to do it with as much awareness as possible. Two bites into my Elstar Cake, I’ve got a smile on my face as I think about exactly what it means to eat “Swiss”.

Read more...

Tender Elstar Apple Cake

This cake inspired quite a rant about Swiss food culture, which you can find here. It's a magnificent example of how thought-provoking a simple, light taste can be.

Every week at the market in Basel, I visit the apple stall and smile contentedly. "phew, there are still Elstars." I dread the day when for some reason, my tangy, crisp friends are done for the season or the supply is exhausted. The Elstar is absolutely my favorite apple, with the most flavor of any I have ever tasted, a slight sour bite, and a rich sweet aftertaste. Oh yes, they're divine. As this recipe was inspired by a traditional Swiss recipe (with lots of butter and eggs, so we've modified a few things), it seems only fitting to use a local apple.

The cake itself is beautifully gluten-free because of the polenta used instead of flour. With the addition of soy yogurt instead of milk, it is so moist and tender, I couldn't resist eating the firs tpiece before I took a picture. It is an excellent dessert or breakfast choice, and has much less sugar than most cakes, so it won't throw you into a coma 30 minutes after eating it. Most important, it is yummy yummy yummy, and it's nice ot think that you're eating something that people here have eaten for hundreds of years. I can almost imagine I am eating the first apple-polenta cake if I close my eyes and savor a bite with the air blowing in the window straight off the Rhine...

Tender Elstar Apple Cake

(Timeframe: 3-4 days. For a quick recipe, see the “Notes” section)

Ingredients:

  • 1/2 cup corn flour
  • 1 1/2 cups polenta
  • ½ cup brown rice flour
  • 1 tsp guar gum (opt.)
  • 2 tbsp fresh flax meal (opt.)
  • 2-3 cups water kefir, milk kefir, or yogurt
  • ¼ cup sunflower oil
  • 6 crisp Elstar apples, or your favorite local variety
  • ½ cup cashews, walnuts, or pecans
  • 1/3 cup elderberry blossom syrup* (or sweetener to taste)
  • ¼ cup raw sugar
  • ½ tsp grated nutmeg
  • 2 tsp cinnamon
  • 2 tsp baking powder (opt.)
  • 1 lemon


Directions: (always have all ingredients at room temperature to assist yeast development)
Starter:
  1. Mix corn flour, ½ tsp guar gum, and 1 cup of kefir/yogurt in a clean glass container until it is moist and gooooshy. Cover loosely with a cloth and set in a warm place for 1-3 days, until bubbly and fluffy, stirring at least once daily.

Batter:
  1. When the starter is ready, mix together the polenta, rice flour, sugar, and 1-2 cups kefir (at least 1 cup, and the rest can be water), or as much as you need to make a stirrable mix
  2. Add starter, mix well, and cover in a warm place for at least 12 hours.
  3. 2-4 hours before baking, activate your nuts by soaking them in water. Drain water when finished and grind the nuts into coarse pieces.
  4. Add 1/3 cup water to the flax meal in a sauce pan, and bring to a simmer over low heat, stirring occasionally. Let simmer for a few minutes, remove from heat, and let cool, continuing to stir occasionally.
  5. Slice the apples into medium-thin slices, squeezing juice of half a lemon on them and tossing to prevent browning as you go.
  6. Preheat oven to 350 F (175 C)
  7. Mix brown rice flour, guar gum, and baking powder together, then add to the batter.
  8. Stir in the nuts, ¼ cup elderberry blossom syrup (save the rest for garnish), the flax meal mixture, cinnamon, nutmeg, oil, and all but 10 or so slices of apple.
  9. Pour batter into an oiled, floured casserole or cake pan, and arrange the leftover apple slices on top.
  10. Dust with cinnamon and nutmeg.
  11. Bake for 10 minutes and turn the heat down to 325 F (162 C).
  12. Bake for 30 minutes, or until firm. Serve with yogurt and drizzle with elderberry blossom syrup mixed with the juice of half a lemon**.
If you find some leftover in a few days, check out Gingerbread Pudding, the cake recycling recipe

Notes:
This is a fermented version of the recipe, which is not necessary, but aids in digestibility of grains and adds a wonderful zing to the flavor. If you would rather make this spur-of-the-moment, cook the polenta in milk or water until done, and treat it as your starter. Begin from step 3 under batter. Leave out the cornflour (it is used in the fermented version as a good sourdough starter flour, but it isn’t necessary to make the cake itself.)

*This is a delicate Swiss specialty which I get from my boyfriend’s mom, and I never saw it in the states or anywhere else. If you can’t find it, use a different sweetener with a light taste, like agave nectar or sugar


**Instead of this mixture, you can do the classic powdered sugar and lemon juice icing and drizzle it on top. Mmmm!

Read more...

Mom's Skillet-Baked Cornbread

>> Monday, January 26

My mom grew up in America's south and southwest, and her cooking has always maintained a hefty southern tang. From Mexican-inspired dishes like enchiladas, black bean soup, chili, and tostadas, to classic American dishes like baked yams, chicken-fried steak, barbecued ribs, and sour bean salads, guests at her table have never gone unsatisfied with her simple, hearty cooking. And mind you, rarely was there a meal that didn't involve one of her heavy old cast-ion skillets. "Girl's gotta get her iron," she likes to say, "and that's not exactly what comes out of teflon."

She and I both started eating gluten free around the same time, and I slowly moved towards veganism-this meant a lot less of those favorite meals I had always had-fried wheat noodles with yeast and soy sauce, homemade gluten-meat, and beef stew. For a while we nibbled sadly at what was sold to us as gluten-free rice bread, and chased the crumbly mess with warm rice milk hot chocolate, reminiscing about the days of baking muffins together early in the morning, and catching the first whiff of rich molasses buns on rainy evenings Dark times, that's all I can say.

The Renaissance bloomed when we realized that what we needed were not necessarily imitations of gluten-containing products, but naturally gluten-free things that we could enjoy just as they were. Suddenly, cooking was magic again. And one of the most magical things of all was just a skillet flip away: Mom's cornbread.

This particular cornbread is so moist and decadant you could treat it like a cake if you wanted to. In fact, when I first made it for Dani and his roommate, they were amused at the name "cornbread" as what I had clearly just made was a corn cake. Elaborating on this idea, it is easy to create a sweet cornbread (ahem, "cake") by adding a bit of molasses, sugar, lemon and poppyseeds, or apples, ginger, anis, and cinnamon for a rich spice cake. Similarly, the simple flavor of the base recipe can be brought more to the savory side with garlic, onions, peppers, tomatoes, basil, thyme, rosemary, fresh corn, beans, chili powder, curry, or black olives. This is one versatile little loaf, and so easy you may well find yourself with an empty skillet before dinner's finished.

Mom's Skillet-Baked Cornbread
(The original recipe has been adapted to be vegan as well as gluten-free)

Ingredients:

  • 2 cups total flour (at least 1 cup of polenta/coarse corn meal, and the rest in your choice of flour. I like to do 1 1/2 cups polenta and 1/2 cup rice or chickpea flour)
  • 3/4 cup milk (almond is fantastic)
  • 1/3 cup oil
  • pinch of salt
  • 1 tsp raw sugar
  • 2 tsp baking powder
Directions:
  1. Preheat the oven to 375 F (190 C)
  2. Mix all dry ingredients together in a bowl
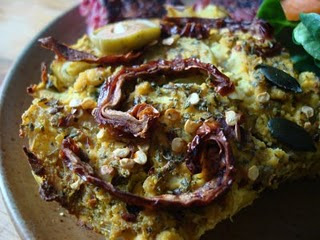
  3. Mix in the milk a little at a time until you have a very thick, not-quite-pancake-batter consistency.
  4. In a medium cast-iron skillet*, heat the oil over a low flame until just bubbling (not smoking!), tilting the pan to coat the sides and bottom.
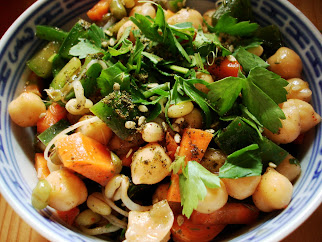
  5. When bubbling, pour the oil into the batter and combine quickly.
  6. Pour everything back into the same skillet* and put it in the oven
  7. Immediately reduce the heat to 325 F (160-165 C) and bake for 30 minutes or until a toothpick in the center comes out mostly clean (extra moist is ok!)
Notes:
* If you don't have a cast-iron skillet, as many people don't, you can heat the oil in a sauce pan and pour the finished batter into a gratin form or bread loaf pan. If you use a loaf pan, keep the heat lower and cook a little longer so it has a chance to cook in the middle.

There are SO many variations possible with this recipe! here are a few:

Eggier Cornbread
Before beginning, grind 2-3 tbsp flax seeds and let sit in a glass with 1/4 cup hot water for 5-10 minutes, stirring occasionally. When it is thick and viscous, add it with the milk and continue as before.

Tuscan Cornbread

Puree tomatoes, basil, and garlic and substitute for the milk. Slice up black olives and add to the batter. Garnish the top with salt, pepper, rings of sliced onion and Italian herbs-thyme, basil, marjoram, etc.

Richer, Fluffier, Generally more Fantastic Cornbread
substitute soy yogurt or silken tofu for most or all of the milk. Add a splash more milk if needed to get the right consistency.

Apple-Spice Cornbread
To dry ingredients add 1/2 tsp cinnamon, 1/4 tsp nutmeg, 1/4 tsp anis, and a pinch of cardamom. Grate in 1 apple when adding the milk (reduce the amount of milk to make up for the fruit's moisture, and/or use yogurt instead of the milk), and add 1-2 medium apples, chopped in slices. Increase sugar or add 2 tbsp molasses/agave nectar.

Lemon-Poppyseed Cornbread
Substitute soy yogurt or silken tofu for some or all of the milk. Add the juice of 1 whole lemon, and the grated rind if organic. Add 3 tbsp poppyseeds and agave nectar or other sweetener.

See also:
Morning-After Carrot Bread

Read more...

  © Blogger templates Shiny by Ourblogtemplates.com 2008

Back to TOP